So your Lawn is full of the dreaded Clover. Well did you know that until fairly recently, clover was not considered as a weed at all and indeed was liked by gardeners because it gave their Lawn a deeper green look.
This happens because Clover removes Nitrogen from the air and transfers it to your Lawn. In fact, some garden suppliers include Clover in their proprietary lawn mixes even today! It helps the grass grow more pest resistant, reduces the amount of fertilizer required, (so is good for the environment) and leaves the Lawn much healthier.
As a kid you probably went clover searching - looking for that one magical four-leaf charm. Seeing clover's shamrocks and little white or pink flowers in your lawn nowadays probably doesn't make you feel lucky anymore. Like many a perennial weed, clover can be hard to evict from your lawn.
As a result, it's one of the most common weeds around. Even though it's green and its flowers are, admit it, sort of cute, it attracts bees, which can be an underfoot danger, and is also quite slippery when wet, another danger.
So your probably asking what's the best method of Killing Clover In The Lawn?
The most effective method of controlling clover is to maintain a dense and healthy turf area. Often weeds can be easily kept out if the Ph and nutrients levels are optimum. Then a cornmeal application can be use to control the weeds. Use 10 pounds per 1,000 sq ft every 120 days simply as a fertilizer as well.
Mowing height and the frequency of mowing also will deter these weeds.
Clover does especially well in moist conditions and in less than optimally fertile soil. The one nutrient it really goes for is phosphorous.
So if you cut back on the water and up the level of the nutrients, other than phosphorous, that your lawn needs to thrive, your lawn will do better and weeds like clover will do worse. The best defense against any weed, clover included, is a healthy lawn.
Pulling weeds by hand also works in small lawns. Clover has a taproot you can easily dig out by hand. For spot control a little spade action is hard to beat.
In the last resort, chemical action is sometimes necessary, especially when managing large areas. Always read and follow directions on the label and keep pets and children away! Post-emergent herbicides do a great job on clover. A weed-and-feed that lists clover as among its targets will help tackle any serious clover encroachments.
Terry Blackburn. Internet Marketing Consultant, living in South Shields in the North-East of England. Author and Producer of blog http://www.lawnsurgeon.blogspot.com./ Author of "Your Perfect Lawn," a 90 Page eBook devoted to Lawn Preparation, Lawn Care and Maintenance.
I would be very interested to have your comments on this Article.
Article Source: http://EzineArticles.com/?expert=Terry_Blackburn
Showing posts with label clover. Show all posts
Thursday, December 03, 2009
Thursday, September 06, 2007
Ornamental Grasses- Care and Maintenance!
I am often asked questions about care of Ornamental Grass in the garden. I came across this excellent Article by the University of Illinois at http://www.urbanext.uiuc.edu/grasses/understanding.html
which sheds light on the whole subject and which I recommend to all gardeners.
"With the popularity of ornamental grasses and their use in the landscape, it is a good idea to understand how these plants grow. This understanding will lead to better use of these plants and often avoid disappointment or frustration.
Grasses respond and start to grow based upon temperature. Some grasses will start to grow in early spring when temperatures are still cool and others will wait until the soil is warm and temperatures are more stable.
Cool Season Grasses
Cool season grass will start to grow early in the spring and may even remain semi-evergreen over the winter. Cool season grasses also seem to do better and have better foliage quality when temperatures are cool or if they are given sufficient water during drought periods. If they are not watered during drought, they tend to go dormant resulting in brown foliage.
These grasses may require more frequent division to keep them healthy looking and vigorous. If not, they tend to die out in the center. For the ones that remain semi-evergreen, you should only cut off the brown or winter injured foliage in the spring. Some of the more popular cool season grasses include, Fescues, Blue Oat Grass (Helictotrichon), Tufted Hair Grass (Deschampsia), and Autumn Moor Grass (Sesleria).
Warm Season Grasses
Warm season grasses will do better during warmer times of the year and remain good looking even when temperatures are high and moisture is limited. Warm season grasses do not begin to show growth until the weather becomes stable and the soils warm. The previous seasons growth usually browns out in the fall requiring the cutting back of plants to about 4-6 inches in the spring.
Warm season grasses usually do not require as much regular division as cool season grasses. Some warm season grasses include Northern Sea Oats (Chasmanthium), Japanese Silver Grass (Miscanthus sp.), Hardy Pampas Grass (Erianthus), Perennial Fountain Grass (Pennisetum), Switch Grass (Panicum) and Prairie Cord Grass (Spartina).
Growth Habits
Before planting you should also understand the growth habit of the grass. Grasses can be either clump forming or rhizome forming. The latter is often called "running" grass. The clump forming grasses will grow in very nice, neat mounds or clumps. They tend to mix very well with other perennials and will not become invasive. They will increase in girth slowly over time.
The rhizome forming grasses spread by underground stems and can become very aggressive and invasive. These grasses have their place but it may not be in a well-tended perennial border since they can soon take over an entire area. Before selecting a grass, be sure to understand how it grows so you won’t be planting a future problem. Some attractive but aggressive grasses include Blue Lymegrass, Cordgrass, and Ribbongrass.
Fertilizer
As with any other perennial, success depends greatly on soil preparation before planting and having good drainage. Ideally, the planting areas should be prepared in the fall, beginning with deep tilling of the soil. Fall tillage facilitates freezing and thawing action during the winter, and improves soil tilth and workability. If this is not possible, spring tillage is also satisfactory.
Incorporate ample organic matter during the tillage process. Ornamental grasses do not require high amounts of fertilizer. Adding about one pound of a general-purpose fertilizer (like 10-10-10) during soil preparation per 100 sq. ft. of planting bed should be sufficient.
Ornamental grasses can be planted in the spring or the fall. The advantage of spring planting is to give the plants adequate time to develop a good root system before winter. Fall planting is often not as reliable without some additional precautions, particularly in years with early or severe winters. You should try to complete fall planting during August and September.
Then provide a light cover of straw or hay during the first winter for best results. Apply the mulch after several hard frosts. Plants should be planted no deeper than their previous growing depths and should be well watered after planting. Maintaining uniform soil moisture around the plant hastens establishment. Plants planted too deep tend to develop root diseases or simply rot in the ground.
Ornamental grasses require relatively low levels of fertility. By keeping the level of nitrogen low, lodging or flopping over can be kept to a minimum. Leaf color and vigour are good guides to nitrogen requirements. Application of one-half to one pound of 10-10-10 fertilizer per 100 sq. ft. of garden area or about one-quarter cup per plant is sufficient. Apply fertilizer just as growth resumes in the spring. An application of a slow release fertilizer in the spring is enough to take care of the plant's needs throughout the summer. Fertilizer should be watered in thoroughly.
Water
Plants should be well watered the first season after planting so they can develop a good root system. Established plants do not need regular watering, but may need supplemental watering during drought periods. The amount of water will depend on the grass species, the site, and on the quality, size and growth rate desired.
Weed Control
Cultivate around grass plants to control weeds. Application of mulch will greatly reduce the need for cultivation as well as watering. It also tends to keep grasses in check that have a tendency to be heavy reseeding types.
Winter Protection and Spring Clean up
Grasses do not need to be cut down before winter. In fact, they are attractive when left standing and the foliage helps to insulate the crown of the plant. Cut back the foliage to about 4-6 inches in the spring before growth resumes. When foliage is removed, spring growth will begin earlier. Old foliage left on the plant can delay the crown’s warming and subsequent growth by as much as 3 weeks.
Division
Division depends on the spacing and visual appearance of the plants as well as the overall health. Plants suffering from die-out in the center should be divided to improve appearances. Division is done in the spring before growth resumes or in the late summer or fall after the growing season. Plants that bloom late could be divided in the spring."
which sheds light on the whole subject and which I recommend to all gardeners.
"With the popularity of ornamental grasses and their use in the landscape, it is a good idea to understand how these plants grow. This understanding will lead to better use of these plants and often avoid disappointment or frustration.
Grasses respond and start to grow based upon temperature. Some grasses will start to grow in early spring when temperatures are still cool and others will wait until the soil is warm and temperatures are more stable.
Cool Season Grasses
Cool season grass will start to grow early in the spring and may even remain semi-evergreen over the winter. Cool season grasses also seem to do better and have better foliage quality when temperatures are cool or if they are given sufficient water during drought periods. If they are not watered during drought, they tend to go dormant resulting in brown foliage.
These grasses may require more frequent division to keep them healthy looking and vigorous. If not, they tend to die out in the center. For the ones that remain semi-evergreen, you should only cut off the brown or winter injured foliage in the spring. Some of the more popular cool season grasses include, Fescues, Blue Oat Grass (Helictotrichon), Tufted Hair Grass (Deschampsia), and Autumn Moor Grass (Sesleria).
Warm Season Grasses
Warm season grasses will do better during warmer times of the year and remain good looking even when temperatures are high and moisture is limited. Warm season grasses do not begin to show growth until the weather becomes stable and the soils warm. The previous seasons growth usually browns out in the fall requiring the cutting back of plants to about 4-6 inches in the spring.
Warm season grasses usually do not require as much regular division as cool season grasses. Some warm season grasses include Northern Sea Oats (Chasmanthium), Japanese Silver Grass (Miscanthus sp.), Hardy Pampas Grass (Erianthus), Perennial Fountain Grass (Pennisetum), Switch Grass (Panicum) and Prairie Cord Grass (Spartina).
Growth Habits
Before planting you should also understand the growth habit of the grass. Grasses can be either clump forming or rhizome forming. The latter is often called "running" grass. The clump forming grasses will grow in very nice, neat mounds or clumps. They tend to mix very well with other perennials and will not become invasive. They will increase in girth slowly over time.
The rhizome forming grasses spread by underground stems and can become very aggressive and invasive. These grasses have their place but it may not be in a well-tended perennial border since they can soon take over an entire area. Before selecting a grass, be sure to understand how it grows so you won’t be planting a future problem. Some attractive but aggressive grasses include Blue Lymegrass, Cordgrass, and Ribbongrass.
Fertilizer
As with any other perennial, success depends greatly on soil preparation before planting and having good drainage. Ideally, the planting areas should be prepared in the fall, beginning with deep tilling of the soil. Fall tillage facilitates freezing and thawing action during the winter, and improves soil tilth and workability. If this is not possible, spring tillage is also satisfactory.
Incorporate ample organic matter during the tillage process. Ornamental grasses do not require high amounts of fertilizer. Adding about one pound of a general-purpose fertilizer (like 10-10-10) during soil preparation per 100 sq. ft. of planting bed should be sufficient.
Ornamental grasses can be planted in the spring or the fall. The advantage of spring planting is to give the plants adequate time to develop a good root system before winter. Fall planting is often not as reliable without some additional precautions, particularly in years with early or severe winters. You should try to complete fall planting during August and September.
Then provide a light cover of straw or hay during the first winter for best results. Apply the mulch after several hard frosts. Plants should be planted no deeper than their previous growing depths and should be well watered after planting. Maintaining uniform soil moisture around the plant hastens establishment. Plants planted too deep tend to develop root diseases or simply rot in the ground.
Ornamental grasses require relatively low levels of fertility. By keeping the level of nitrogen low, lodging or flopping over can be kept to a minimum. Leaf color and vigour are good guides to nitrogen requirements. Application of one-half to one pound of 10-10-10 fertilizer per 100 sq. ft. of garden area or about one-quarter cup per plant is sufficient. Apply fertilizer just as growth resumes in the spring. An application of a slow release fertilizer in the spring is enough to take care of the plant's needs throughout the summer. Fertilizer should be watered in thoroughly.
Water
Plants should be well watered the first season after planting so they can develop a good root system. Established plants do not need regular watering, but may need supplemental watering during drought periods. The amount of water will depend on the grass species, the site, and on the quality, size and growth rate desired.
Weed Control
Cultivate around grass plants to control weeds. Application of mulch will greatly reduce the need for cultivation as well as watering. It also tends to keep grasses in check that have a tendency to be heavy reseeding types.
Winter Protection and Spring Clean up
Grasses do not need to be cut down before winter. In fact, they are attractive when left standing and the foliage helps to insulate the crown of the plant. Cut back the foliage to about 4-6 inches in the spring before growth resumes. When foliage is removed, spring growth will begin earlier. Old foliage left on the plant can delay the crown’s warming and subsequent growth by as much as 3 weeks.
Division
Division depends on the spacing and visual appearance of the plants as well as the overall health. Plants suffering from die-out in the center should be divided to improve appearances. Division is done in the spring before growth resumes or in the late summer or fall after the growing season. Plants that bloom late could be divided in the spring."
Tuesday, September 04, 2007
How to Keep Cats Out of Your Garden!
Do cat repellents work? How do I stop cats from using my garden as a toilet? How can I keep cats out of my garden? These are among the most frequently asked questions by gardeners everywhere.
The first line of defence should be to ensure that your garden boundaries are secure. Any gaps in your fence should be blocked to deny low level access. Cats however can jump rather well and rather high, so fix a taut wire or string some six inches above the top of your fence to deter this approach.
Once inside your garden many people say that the best cat repellent is a dog who will soon see off any feline invader. That pre-supposes that you are a dog lover. If not, then you will have to resort to more passive methods. For example, cats like to lie on freshly dug soil, so you should lay mulch on your borders so that no bare soil is left exposed. Seed beds should be covered with wire netting or twigs arranged as a barrier.
Young trees should have plastic guards fitted around their trunks to protect them against use as a scratching pole. Your garden pond should be covered with netting to keep your fish safe.
Cats are generally known to dislike water, so a well aimed bucketful or a squirt with the hose will certainly make an intruder run. After one or two dousings it may learn the lesson and stay away.
To protect plants and borders, both mothballs and citrus are said to be effective deterrents. Place the mothballs, orange peel or lemon rind in the borders. Alternatively spray cloths with orange scented air freshener and place the cloths around the plants you wish to protect. Other known cat repellents are cayenne pepper, coffee grounds, pipe tobacco, lavender oil, lemon grass oil, citronella oil, eucalyptus oil and mustard oil.
Certain herbs are said to deter cats. In particular rue but not catmint which has the opposite effect. Coleus canina is another plant which is marketed by one merchant as a cat repellent.
If you visit your local garden center or hardware store you will find several cat repellent products on sale. These range from electric water sprinklers and ultrasonic devices to sprays and granules.
Motion activated sprinklers act in the same way as a burglar alarm using an infra red detector. When the cat enters the area covered by the detector the sprinkler shoots out a jet of water to scare the animal away. It is claimed that, after one or two encounters with the jet, the cat will learn to avoid the area.
Ultrasonic devices emit a high frequency sound which is annoying to cats (and dogs) but is not audible to humans. There are various different models some of which operate continuously and others which have an infra red detector and only emit a pulse of sound when the cat triggers the device. To be successful you need to ensure that the model is powerful enough to cover the area you wish to protect. In addition make sure that the sound frequency is designed for larger animals since some models are intended to deter insects and so would be no use for cats.
There are also commercial scent cat repellents. Those that use chemicals should be kept away from any food crops but the essential oil based granule varieties act in the same way as orange and lemon peel mentioned above. Another way to keep a cat out if the garden is a repellent evaporator which consists of a container holding puffed rice which has been impregnated with essential oils. These are effective for three to four weeks and can then be refilled for a further period. Another natural product which many people claim really keeps a cat out of the garden is lion's dung. You may need to visit your local zoo to obtain this although some stores do stock zoo poo.
In Ontario, Canada the local township provides a cat trap service. Once the animal enters the cage it cannot escape but is completely unharmed. The owner has to pay to recover his pet and so should be encouraged not to let the cat stray in future. Apparently few owners bother to reclaim their cats but just obtain another kitten. However this sounds like a good way of dealing with a cat that cannot be deterred by any other method. If there is no such scheme in your area, just buy your own trap.
So, to recap, the first priority is to secure your boundary fences. Then you have the whole selection of suggested cat repellents ranging from homemade recipes to expensive commercial gadgets. I would suggest that you try the orange peel and prickly twigs for a start. If you are around when the intruder appears, try the bucket of water or hose. Even if you miss, the shock may be a sufficient deterrent. If these do not do the trick, then you may have to consider the commercial alternatives.
With thanks for this Article by Hugh Harris-Evans at http://members.ezinearticles.com/index.php
The first line of defence should be to ensure that your garden boundaries are secure. Any gaps in your fence should be blocked to deny low level access. Cats however can jump rather well and rather high, so fix a taut wire or string some six inches above the top of your fence to deter this approach.
Once inside your garden many people say that the best cat repellent is a dog who will soon see off any feline invader. That pre-supposes that you are a dog lover. If not, then you will have to resort to more passive methods. For example, cats like to lie on freshly dug soil, so you should lay mulch on your borders so that no bare soil is left exposed. Seed beds should be covered with wire netting or twigs arranged as a barrier.
Young trees should have plastic guards fitted around their trunks to protect them against use as a scratching pole. Your garden pond should be covered with netting to keep your fish safe.
Cats are generally known to dislike water, so a well aimed bucketful or a squirt with the hose will certainly make an intruder run. After one or two dousings it may learn the lesson and stay away.
To protect plants and borders, both mothballs and citrus are said to be effective deterrents. Place the mothballs, orange peel or lemon rind in the borders. Alternatively spray cloths with orange scented air freshener and place the cloths around the plants you wish to protect. Other known cat repellents are cayenne pepper, coffee grounds, pipe tobacco, lavender oil, lemon grass oil, citronella oil, eucalyptus oil and mustard oil.
Certain herbs are said to deter cats. In particular rue but not catmint which has the opposite effect. Coleus canina is another plant which is marketed by one merchant as a cat repellent.
If you visit your local garden center or hardware store you will find several cat repellent products on sale. These range from electric water sprinklers and ultrasonic devices to sprays and granules.
Motion activated sprinklers act in the same way as a burglar alarm using an infra red detector. When the cat enters the area covered by the detector the sprinkler shoots out a jet of water to scare the animal away. It is claimed that, after one or two encounters with the jet, the cat will learn to avoid the area.
Ultrasonic devices emit a high frequency sound which is annoying to cats (and dogs) but is not audible to humans. There are various different models some of which operate continuously and others which have an infra red detector and only emit a pulse of sound when the cat triggers the device. To be successful you need to ensure that the model is powerful enough to cover the area you wish to protect. In addition make sure that the sound frequency is designed for larger animals since some models are intended to deter insects and so would be no use for cats.
There are also commercial scent cat repellents. Those that use chemicals should be kept away from any food crops but the essential oil based granule varieties act in the same way as orange and lemon peel mentioned above. Another way to keep a cat out if the garden is a repellent evaporator which consists of a container holding puffed rice which has been impregnated with essential oils. These are effective for three to four weeks and can then be refilled for a further period. Another natural product which many people claim really keeps a cat out of the garden is lion's dung. You may need to visit your local zoo to obtain this although some stores do stock zoo poo.
In Ontario, Canada the local township provides a cat trap service. Once the animal enters the cage it cannot escape but is completely unharmed. The owner has to pay to recover his pet and so should be encouraged not to let the cat stray in future. Apparently few owners bother to reclaim their cats but just obtain another kitten. However this sounds like a good way of dealing with a cat that cannot be deterred by any other method. If there is no such scheme in your area, just buy your own trap.
So, to recap, the first priority is to secure your boundary fences. Then you have the whole selection of suggested cat repellents ranging from homemade recipes to expensive commercial gadgets. I would suggest that you try the orange peel and prickly twigs for a start. If you are around when the intruder appears, try the bucket of water or hose. Even if you miss, the shock may be a sufficient deterrent. If these do not do the trick, then you may have to consider the commercial alternatives.
With thanks for this Article by Hugh Harris-Evans at http://members.ezinearticles.com/index.php
Saturday, September 01, 2007
Ants! How to Deal with them in Your Garden.
Thanks to Wikipedia for the following information on Ants.
"Modern society considers the ant a pest and due to the adaptive nature of ant colonies, eliminating them is nearly impossible. Pest control with regard to ants is more a matter of controlling local populations than eliminating an entire colony. Attempts to control ant populations of any kind are temporary solutions.
Typical ants that are classified as pests include pavement ants (otherwise known as the sugar ant), Pharaoh ants, carpenter ants, Argentine ants, and the red imported fire ant. Control of species populations are usually done with bait insecticides, which are either in the form of small granules, or as a sticky liquid that is gathered by the ants as food and then brought back to the nest where the poison is inadvertently spread to other members of the brood — a system that can severely reduce the numbers in a colony if used properly.
Boric acid and borax are often used as insecticides that are relatively safe for humans. With the recent insurgence of the red imported fire ant, a tactic called broadcast baiting has been employed, by which the substance (usually a granule bait designed specifically for fire ants) is spread across a large area, such as a lawn, in order to control populations. Nests may be destroyed by tracing the ants' trails back to the nest, then pouring boiling water into it to kill the queen. This works in about 60% of the mounds and needs about 14 litres (3 gallons) per mound.
Ants that tend other insects can indirectly cause pest infestations. Many homopteran insects that are considered as horticultural pests are controlled by the use of grease rings on the trunks of the trees. These rings cut off the routes for ants and make the pest species vulnerable to parasites and predators."
"Modern society considers the ant a pest and due to the adaptive nature of ant colonies, eliminating them is nearly impossible. Pest control with regard to ants is more a matter of controlling local populations than eliminating an entire colony. Attempts to control ant populations of any kind are temporary solutions.
Typical ants that are classified as pests include pavement ants (otherwise known as the sugar ant), Pharaoh ants, carpenter ants, Argentine ants, and the red imported fire ant. Control of species populations are usually done with bait insecticides, which are either in the form of small granules, or as a sticky liquid that is gathered by the ants as food and then brought back to the nest where the poison is inadvertently spread to other members of the brood — a system that can severely reduce the numbers in a colony if used properly.
Boric acid and borax are often used as insecticides that are relatively safe for humans. With the recent insurgence of the red imported fire ant, a tactic called broadcast baiting has been employed, by which the substance (usually a granule bait designed specifically for fire ants) is spread across a large area, such as a lawn, in order to control populations. Nests may be destroyed by tracing the ants' trails back to the nest, then pouring boiling water into it to kill the queen. This works in about 60% of the mounds and needs about 14 litres (3 gallons) per mound.
Ants that tend other insects can indirectly cause pest infestations. Many homopteran insects that are considered as horticultural pests are controlled by the use of grease rings on the trunks of the trees. These rings cut off the routes for ants and make the pest species vulnerable to parasites and predators."
Thursday, August 30, 2007
Dandelion!

Dandelion! The Ultimate Weed!
Some people like the sight of yellow dandelion flowers in their lawn. Others may even appreciate their skyward-stretching puffballs. But if you're not one of those people, we can suggest some natural and organic methods for controlling dandelions.
Pulling dandelions by hand is not that easy, but it can be done. You need to get the whole tap root out—if you don't, the piece you've left in the ground will sprout new foliage and, eventually, yellow flowers and white puffballs.
For little weeds, pulling the tap root out is not too hard if you're careful. For larger specimens, it can be nearly impossible. A special "dandelion digger" tool can help, as can attempting your weed-pulling operation after it's rained, when the ground it still a little loose.
Dandelions grow in one of two ways; from a dandelion seed that germinates, or from a still-viable piece of tap root that's under the surface. If you can interrupt the seed production cycle AND starve the tap roots of nutrients, you can defeat your lawn's dandelions without having to buy any chemicals or other products. Here's how to approach this:
1. Pick off the Heads — As soon as you see a dandelion plant's yellow flowers, pick the heads off. That will prevent them from getting to the puffball stage, when they release the seeds for the next generation of your lawn's worst nightmare.
2. Pick off the Leaves — Picking the leaves off a dandelion will not kill it because the tap root remains below the surface and will quickly send up new leaves. But repeatedly picking off the leaves will eventually starve the tap root of nutrients and kill the weed.
3. Corn gluten meal—which, just like it sounds, is naturally derived from corn. It acts by suppressing the germination process of a variety of weed seeds, including crabgrass and dandelion.
A multi-year program of applying corn gluten meal every spring will eventually give you a weed-free lawn. Remember that corn gluten meal will suppress germination of grass seeds as well, so time your applications away from reseedings.
The only other downside of corn gluten meal is that it will also kill the beneficial, nitrogen-fixing clover in your lawn, but we recognize that from some people's perspectives, that's a good thing.
Corn gluten meal also benefits your grass by adding nitrogen to the soil.
If you like spending money on mechanical gadgets to help you with your gardening, you'll find a variety of appliances such as flame weeders, mechanical pullers, water-powered weeders, and heat zappers, all designed to kill your dandelions off. These do work but are expensive.
Clover!

So your Lawn is full of the dreaded Clover. Well did you know that until fairly recently, clover was not considered as a weed at all and indeed was liked by gardeners because it gave their Lawn a deeper green look.
This happens because Clover removes Nitrogen from the air and transfers it to your Lawn. In fact, some garden suppliers include Clover in their proprietory lawn mixes even today! It helps the grass grow more pest resistant, reduces the amount of fertilizer required, (so is good for the environment) and leaves the Lawn much healthier.
As a kid you probably went clover searching - looking for that one magical four-leaf charm. Seeing clover's shamrocks and little white or pink flowers in your lawn nowadays probably doesn't make you feel lucky anymore. Like many a perennial weed, clover can be hard to evict from your lawn.
As a result, it's one of the most common weeds around. Even though it's green and its flowers are, admit it, sort of cute, it attracts bees, which can be an underfoot danger, and is also quite slippery when wet, another danger.
So your probably asking what's the best method of Killing Clover In The Lawn?
The most effective method of controlling clover is to maintain a dense and healthy turf area. Often weeds can be easily kept out if the Ph and nutrients levels are optimum. Then a cornmeal application can be use to control the weeds. Use 10 pounds per 1,000 sq ft every 120 days simply as a fertilizer as well.
Mowing height and the frequency of mowing also will deter these weeds.
Clover does especially well in moist conditions and in less than optimally fertile soil. The one nutrient it really goes for is phosphorous.
So if you cut back on the water and up the level of the nutrients, other than phosphorous, that your lawn needs to thrive, your lawn will do better and weeds like clover will do worse. The best defense against any weed, clover included, is a healthy lawn.
Pulling weeds by hand also works in small lawns. Clover has a taproot you can easily dig out by hand. For spot control a little spade action is hard to beat.
In the last resort, chemical action is sometimes necessary, especially when managing large areas. Always read and follow directions on the label and keep pets and children away! Post-emergent herbicides do a great job on clover. A weed-and-feed that lists clover as among its targets will help tackle any serious clover encroachments.
Terry Blackburn. Internet Marketing Consultant, living in South Shields in the North-East of England. Author and Producer of blog http://www.lawnsurgeon.blogspot.com Author of "Your Perfect Lawn," a 90 Page eBook devoted to Lawn Preparation, Lawn Care and Maintenance. Find it at http://www.lawnsurgeon.com
I would be very interested to have your comments on this Article.
Subscribe to:
Posts (Atom)
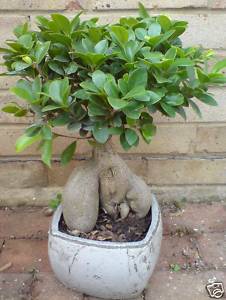
My Ficus Ginseng Plant!
Cool or What?