If you want to reduce your work load next Spring, I recommend you start any new garden beds now.
As you empty annual beds this Autumn, there are two main ways to enrich the soil.
1. Spread compost or plant cover crops.
Before you spread compost, dig or lightly till in any plants that aren't diseased to return nutrients to the soil. Spread compost, even if it's not well decomposed yet. It will protect the soil over the winter and break down by spring planting time.
2. Plant cover crops, such as buckwheat or annual rye that will grow this fall and early spring until you till it under several weeks before planting.
Now on to those weeds. Make sure you remove them or next Spring I guarantee you will get some kind of backache. Since bare soil invites weeds, cover bare soil with mulch, such as layers of wet newspaper covered with straw, compost, or manure. This will control late Autumn and early Spring weed growth and provide organic matter.
Begin preparing tools for storage by cleaning them once you're finished with them. Wipe the soil off shovels, spades, and trowels using a rag or wire brush, then wipe blades with an oiled cloth.
Make sure pruners are free from dirt and plant debris, and wipe down the blades with the oiled cloth. Empty any pots of dead plants and soil, adding the debris to the compost pile unless the plants were diseased. In that case, dispose of the plants in the garbage or a location far away from your garden. Rinse pots, or better yet, soak them in a bucket of water to which some bleach has been added. Rinse well.
Plant garlic now for harvesting next summer. Purchase garlic sold specifically for planting, or buy organic garlic. Commercial, non-organic, supermarket garlic may have been treated to inhibit sprouting. Break the garlic head into individual cloves, keeping the largest ones for planting. (Use the small cloves for cooking.) Plant cloves about three inches apart with the pointy side up. Try some different varieties to see which you prefer. Mulch the bed well with straw.
Test your soil and add any needed amendments now, the soil will be ready for planting when you are in the spring. Some amendments take time to break down and become available to plants.
Lastly, give your lawn a good low cut, and cover bare areas with a layer of mulch.
Wednesday, September 26, 2007
Monday, September 10, 2007
Lawn Care Tasks for Autumn!
Lawn Care During the Autumn Period
So here we are in September and there are things to do for our Lawn to prepare for the coming Winter.
1. Rake Up Autumn Leaves.
Don't leave Autumn leaves on the lawn as they can lead to bare patches. Rake off into a bag. Removing leaves is best done when the Lawn is dry, so get this done in early Autumn, before the weather turns wet. Don’t leave this job too late. The leaves can then be used for composting, along with any grass cuttings.
2. Scarifying
Scarifying removes the build up of dead organic matter or thatch, which can smother the soil and new growth. This should only be necessary where the soil is compacted or very acidic. Look after your Worms which remove dead organic matter naturally.
The main benefit to scarifying is that it helps to cut back the stems and creeping roots of the grass encouraging root growth and a thicker turf.
Scarification is a job for late Autumn, when the frequency of mowing is less. Use a spring tined rake. New seeded lawns should not be scarified or raked for about 2 years. Scarification is not a job for spring. Always be careful that you don’t tear up the grass and never rake from disease or moss infested areas onto healthy lawn areas.
3. Aerating.
Aerating is done to counteract compaction. Compaction prevents the roots and soil micro-organisms from breathing. Aerating can be a major task, so you need to concentrate your effort first where most attention is needed. Free draining sandy soils may never need aerating. Work on the trouble spots you’ve identified. Hopefully you’ll be able to move to another area next year. If the whole lawn needs aerating then you might work on a different area each year.
Aerating is achieved by sticking a fork into the surface to about 3 inches deep or more and in rows 6 inches apart. Gently move the fork back and forth before pulling out vertically. You will achieve a more thorough job by using a hollow tine fork. This withdraws soil cores.
Pricking can also be useful before scattering fertilizer but it only penetrates half an inch. By contrast to aerating, manual pricking machines make this a relatively quick and easy job.
4. Top Dressing
Top dress after aerating which will improve the consistency of the lawn soil. Fill in any hollows in the Lawn with a mix of 4 parts loam, 2 parts sand and 1 part leaf mould. Increase the proportion of sand or grit and reduce loam content for heavy clay soils. Increase the leaf mould and reduce the sand for sandy soils.
Lay the mix down along a line 1 or 2 metres long, then spread with a rake or brush. Aim for about 1.6 Kg per square metre.
Lawn Sand is a traditional lawn fertilizer/weed killer material composed of iron sulphate and ammonium sulphate. If you wish to make a fine lawn from a large area of weedy grass then lawn sand is a far better option than hormone weed killers and is more organic.
If you’re using a traditional mix of lawn sand, with no nasty herbicide or hormone additives, it is reasonably safe to use. It kills all broad leaved weeds and moss. However, a considerable problem arises because lawn sand kills clovers and acidifies the ground.
The lawn sand is spread during lawn-moist conditions after which the grass is left un-trampled for a couple of days then well-watered. The iron and ammonium both help to green-up the lawn after an initial blackening.
5. Liming
When soil ph is below 5 consider spreading ground limestone or dolomite on the lawn in Winter. Obviously liming has a counteractive effect on any ph reduction from lawn sand. But don’t use lime for this purpose, indeed avoid using it within a month or two of lawn sand.
Sunday, September 09, 2007
Key Gardening Jobs for Autumn!
Well, the nights are drawing in here in England and there is a slight chill in the air. September is here and Autumn is upon us once more. I thought this "To Do" list
might help in jogging a few memories of things to do around the garden at this time of year.
Early Autumn
. Bring in tender plants under cover before the first frosts
. Plant or move evergreens and conifers, while the soil is still warm
. Plant spring bedding, such as wallflowers and polyanthus
. Plant spring bulbs
Mid Autumn
. Tidy perennials, removing dead stems but leaving seed-heads for birds to eat
. Plant deciduous trees, shrubs and climbers
. Lay new lawns, so long as soil is not too wet
. Batten down the hatches, ensuring nothing can blow about and cause damage on windy nights.
Late Autumn
. Plant shrubs, roses and hedging plants sold with bare roots
. Clear up fallen leaves and compost them
. Plant tulips and hyacinths
. Move deciduous trees and shrubs once they have lost their leaves
. Take hardwood cuttings from shrubs and roses
Thursday, September 06, 2007
Ornamental Grasses- Care and Maintenance!
I am often asked questions about care of Ornamental Grass in the garden. I came across this excellent Article by the University of Illinois at http://www.urbanext.uiuc.edu/grasses/understanding.html
which sheds light on the whole subject and which I recommend to all gardeners.
"With the popularity of ornamental grasses and their use in the landscape, it is a good idea to understand how these plants grow. This understanding will lead to better use of these plants and often avoid disappointment or frustration.
Grasses respond and start to grow based upon temperature. Some grasses will start to grow in early spring when temperatures are still cool and others will wait until the soil is warm and temperatures are more stable.
Cool Season Grasses
Cool season grass will start to grow early in the spring and may even remain semi-evergreen over the winter. Cool season grasses also seem to do better and have better foliage quality when temperatures are cool or if they are given sufficient water during drought periods. If they are not watered during drought, they tend to go dormant resulting in brown foliage.
These grasses may require more frequent division to keep them healthy looking and vigorous. If not, they tend to die out in the center. For the ones that remain semi-evergreen, you should only cut off the brown or winter injured foliage in the spring. Some of the more popular cool season grasses include, Fescues, Blue Oat Grass (Helictotrichon), Tufted Hair Grass (Deschampsia), and Autumn Moor Grass (Sesleria).
Warm Season Grasses
Warm season grasses will do better during warmer times of the year and remain good looking even when temperatures are high and moisture is limited. Warm season grasses do not begin to show growth until the weather becomes stable and the soils warm. The previous seasons growth usually browns out in the fall requiring the cutting back of plants to about 4-6 inches in the spring.
Warm season grasses usually do not require as much regular division as cool season grasses. Some warm season grasses include Northern Sea Oats (Chasmanthium), Japanese Silver Grass (Miscanthus sp.), Hardy Pampas Grass (Erianthus), Perennial Fountain Grass (Pennisetum), Switch Grass (Panicum) and Prairie Cord Grass (Spartina).
Growth Habits
Before planting you should also understand the growth habit of the grass. Grasses can be either clump forming or rhizome forming. The latter is often called "running" grass. The clump forming grasses will grow in very nice, neat mounds or clumps. They tend to mix very well with other perennials and will not become invasive. They will increase in girth slowly over time.
The rhizome forming grasses spread by underground stems and can become very aggressive and invasive. These grasses have their place but it may not be in a well-tended perennial border since they can soon take over an entire area. Before selecting a grass, be sure to understand how it grows so you won’t be planting a future problem. Some attractive but aggressive grasses include Blue Lymegrass, Cordgrass, and Ribbongrass.
Fertilizer
As with any other perennial, success depends greatly on soil preparation before planting and having good drainage. Ideally, the planting areas should be prepared in the fall, beginning with deep tilling of the soil. Fall tillage facilitates freezing and thawing action during the winter, and improves soil tilth and workability. If this is not possible, spring tillage is also satisfactory.
Incorporate ample organic matter during the tillage process. Ornamental grasses do not require high amounts of fertilizer. Adding about one pound of a general-purpose fertilizer (like 10-10-10) during soil preparation per 100 sq. ft. of planting bed should be sufficient.
Ornamental grasses can be planted in the spring or the fall. The advantage of spring planting is to give the plants adequate time to develop a good root system before winter. Fall planting is often not as reliable without some additional precautions, particularly in years with early or severe winters. You should try to complete fall planting during August and September.
Then provide a light cover of straw or hay during the first winter for best results. Apply the mulch after several hard frosts. Plants should be planted no deeper than their previous growing depths and should be well watered after planting. Maintaining uniform soil moisture around the plant hastens establishment. Plants planted too deep tend to develop root diseases or simply rot in the ground.
Ornamental grasses require relatively low levels of fertility. By keeping the level of nitrogen low, lodging or flopping over can be kept to a minimum. Leaf color and vigour are good guides to nitrogen requirements. Application of one-half to one pound of 10-10-10 fertilizer per 100 sq. ft. of garden area or about one-quarter cup per plant is sufficient. Apply fertilizer just as growth resumes in the spring. An application of a slow release fertilizer in the spring is enough to take care of the plant's needs throughout the summer. Fertilizer should be watered in thoroughly.
Water
Plants should be well watered the first season after planting so they can develop a good root system. Established plants do not need regular watering, but may need supplemental watering during drought periods. The amount of water will depend on the grass species, the site, and on the quality, size and growth rate desired.
Weed Control
Cultivate around grass plants to control weeds. Application of mulch will greatly reduce the need for cultivation as well as watering. It also tends to keep grasses in check that have a tendency to be heavy reseeding types.
Winter Protection and Spring Clean up
Grasses do not need to be cut down before winter. In fact, they are attractive when left standing and the foliage helps to insulate the crown of the plant. Cut back the foliage to about 4-6 inches in the spring before growth resumes. When foliage is removed, spring growth will begin earlier. Old foliage left on the plant can delay the crown’s warming and subsequent growth by as much as 3 weeks.
Division
Division depends on the spacing and visual appearance of the plants as well as the overall health. Plants suffering from die-out in the center should be divided to improve appearances. Division is done in the spring before growth resumes or in the late summer or fall after the growing season. Plants that bloom late could be divided in the spring."
Tuesday, September 04, 2007
How to Keep Cats Out of Your Garden!
Do cat repellents work? How do I stop cats from using my garden as a toilet? How can I keep cats out of my garden? These are among the most frequently asked questions by gardeners everywhere.
The first line of defence should be to ensure that your garden boundaries are secure. Any gaps in your fence should be blocked to deny low level access. Cats however can jump rather well and rather high, so fix a taut wire or string some six inches above the top of your fence to deter this approach.
Once inside your garden many people say that the best cat repellent is a dog who will soon see off any feline invader. That pre-supposes that you are a dog lover. If not, then you will have to resort to more passive methods. For example, cats like to lie on freshly dug soil, so you should lay mulch on your borders so that no bare soil is left exposed. Seed beds should be covered with wire netting or twigs arranged as a barrier.
Young trees should have plastic guards fitted around their trunks to protect them against use as a scratching pole. Your garden pond should be covered with netting to keep your fish safe.
Cats are generally known to dislike water, so a well aimed bucketful or a squirt with the hose will certainly make an intruder run. After one or two dousings it may learn the lesson and stay away.
To protect plants and borders, both mothballs and citrus are said to be effective deterrents. Place the mothballs, orange peel or lemon rind in the borders. Alternatively spray cloths with orange scented air freshener and place the cloths around the plants you wish to protect. Other known cat repellents are cayenne pepper, coffee grounds, pipe tobacco, lavender oil, lemon grass oil, citronella oil, eucalyptus oil and mustard oil.
Certain herbs are said to deter cats. In particular rue but not catmint which has the opposite effect. Coleus canina is another plant which is marketed by one merchant as a cat repellent.
If you visit your local garden center or hardware store you will find several cat repellent products on sale. These range from electric water sprinklers and ultrasonic devices to sprays and granules.
Motion activated sprinklers act in the same way as a burglar alarm using an infra red detector. When the cat enters the area covered by the detector the sprinkler shoots out a jet of water to scare the animal away. It is claimed that, after one or two encounters with the jet, the cat will learn to avoid the area.
Ultrasonic devices emit a high frequency sound which is annoying to cats (and dogs) but is not audible to humans. There are various different models some of which operate continuously and others which have an infra red detector and only emit a pulse of sound when the cat triggers the device. To be successful you need to ensure that the model is powerful enough to cover the area you wish to protect. In addition make sure that the sound frequency is designed for larger animals since some models are intended to deter insects and so would be no use for cats.
There are also commercial scent cat repellents. Those that use chemicals should be kept away from any food crops but the essential oil based granule varieties act in the same way as orange and lemon peel mentioned above. Another way to keep a cat out if the garden is a repellent evaporator which consists of a container holding puffed rice which has been impregnated with essential oils. These are effective for three to four weeks and can then be refilled for a further period. Another natural product which many people claim really keeps a cat out of the garden is lion's dung. You may need to visit your local zoo to obtain this although some stores do stock zoo poo.
In Ontario, Canada the local township provides a cat trap service. Once the animal enters the cage it cannot escape but is completely unharmed. The owner has to pay to recover his pet and so should be encouraged not to let the cat stray in future. Apparently few owners bother to reclaim their cats but just obtain another kitten. However this sounds like a good way of dealing with a cat that cannot be deterred by any other method. If there is no such scheme in your area, just buy your own trap.
So, to recap, the first priority is to secure your boundary fences. Then you have the whole selection of suggested cat repellents ranging from homemade recipes to expensive commercial gadgets. I would suggest that you try the orange peel and prickly twigs for a start. If you are around when the intruder appears, try the bucket of water or hose. Even if you miss, the shock may be a sufficient deterrent. If these do not do the trick, then you may have to consider the commercial alternatives.
With thanks for this Article by Hugh Harris-Evans at http://members.ezinearticles.com/index.php
Monday, September 03, 2007
Bald Patches On Your Lawn!
I am indebted to Helen Stephens for the following wonderful Article on dealing with bald patches on your Lawn which was published at http://www.doityourself.com
We all have seen them glaring out at us from amongst the tender new grass, and unfortunately for most home owners, we have at some point personally experienced them - the dreaded bald patch in the yard. They are hideous with their sickly yellow color and mostly dead appearance. No matter how beautiful the rest of our lawn is, those bald spots always stick out, waving their proverbial fingers in our face.
Sometimes it feels like they will never go away, and sometimes it feels like they move from location to location, like a living amoeba of death, consuming spot after spot. Their appearance always begs the question, how can they be destroyed? Before attacking these ugly spots with an arsenal of lawn care products, it is important to determine the origin of the problem, because each source may require a slightly different approach to care.
Patches in the grass have many causes that must be dealt with in order to find the right cure. There are many reasons for those ugly spots, such as bug infestations, seasonal dryness, mowing damage, pet waste, grass diseases, and killer weeds. We will examine each one and determine the best way to battle their attacks.
Bug Infestations
There are many munching culprits that attack either the fresh green growth on the surface of the grass or the tender roots below ground. The worst offenders are caterpillars (like cutworms, army worms, and sod webworms), billbugs, white grubs, fiery skippers, and ataenius. These pests have voracious appetites, so it is important to identify them as soon as the damage is detected. Look for small, irregular spots that grow in size each day, as well as visible evidence of munching within the affected area and surrounding blades of healthy grass.
If no pests are immediately detected, mix 1-2 ounces of dish detergent with a gallon of water and apply it evenly to the damaged area. Surface eaters like caterpillars and fiery skippers will surface to avoid contact with the solution. Since grubs live below the surface, it may be necessary to remove the top layer of damaged sod to look for their little white forms. Once the pests have been detected, you are ready to attack them.
If caterpillars are the problem, begin by thinning or removing the thatch (dead grass). Next, irrigate and fertilize the area, making sure to avoid creating soggy patches. Aerate the damaged section and surrounding lawn. Finally, overseed the damaged spot and surrounding area to encourage dense, new growth.
If billbugs are the issue, irrigate and fertilize the affected spot and increase the mowing level. For white grubs, overseed the lawn to allow for dense growth. Make sure to irrigate and fertilize well. If fiery skippers are found, reduce the thatch and look for a variety of grass that is less appetizing to them. They are more specialized in their eating preferences and can easily be foiled by changing their available menu.
For ataenius, aerate the ground to increase the root growth and raise the level of your mower for a higher cut. Finally, keep in mind that with any biological pest, there are always beneficial predators that can be introduced to help reduce the use of chemicals. Attracting birds to the area is always a plus for controlling and eliminating caterpillars and grubs, as well as the introduction of beneficial nematodes, which feed on all soft bodied insects. Avoid using broad-spectrum pesticides, because they kill the good bugs along with the bad, typically offering a greater advantage to the bad bugs in the end.
Seasonal Dryness
There are two main types of dryness that can affect your turf - Winter dryness, which is caused by an overly dry winter with little rain or snow and Summer dryness, which occurs when temperatures are high and rain levels are low in an area for an extended period of time. Either case of dryness can seriously stress your lawn, causing 'hot spots' of burned, yellow turf.
The best resolution is a two-fold approach. Begin with an application of fertilizer during the spring and summer months. This will ensure healthy, thick growth from the beginning of the growing seasons. Raise the deck of your mower. The higher cut will allow the lawn to better retain the moisture levels in the soil. Supplemental watering during dry periods may be necessary to help ensure consistent moisture.
Mowing Damage
Sometimes in our exuberant efforts to control the level of growth in our yards, we inadvertently damage the grass and create brown patches and bald spots. Infrequent mowing, dull blades, and mowing decks set too low can all produce damage in a lawn.
Make sure at the beginning of the mowing season that mower blades are thoroughly sharpened and kept that way throughout the summer. Inspect blades each time you mow to ensure that they are sharp enough to use. Dull blades rip the grass, forcing the grass to expend extra energy and nutrients to fix the torn sections, ultimately weakening the grass. Mow more frequently. This prevents the chlorophyll producing parts of the grass from being completely removed. Also, raise the level of the deck so that only the top third of the grass is being cut. Combining this last step with more frequent mowing will ensure thicker, more lush green growth overall.
Pet Waste
Regardless of whether the "presents" are left by your neighbor's pet or your own, pet urine and faeces can create unsightly spots in an otherwise healthy, green lawn. According to several studies on pet waste, the problem occurs because of the level of nitrogen in the waste itself. Pet waste has a high level of concentrated nitrogen, and when it is applied to the lawn, it creates the same effect that over-fertilization does - it burns the grass.
Urine is more potent because it is in liquid form. It takes time for faeces to break down so its effects are not as dramatic. All in all, however, pet waste can be a problem.
Unless you want to walk through life pet-less, a varied approach to pet waste should be taken. The first step is to eliminate the issue of other people’s pets using your yard as their public restroom. Begin by putting up a structural or living fence to prevent marauding animals from "going" on your lawn.
With community pets out of the way, you can now address the damage created by your own precious pet. Begin by daily picking up the solid waste in your yard and composting it. For communities that do not have public pet waste composting facilities, there are personal pet composters now on the market. The resulting compost can safely be used anywhere in the garden.
For urine spots, begin by flushing the area with water. Damage is reduced considerably if the area is flushed within 8 hours of urination. Flushing dilutes the nitrogen levels and reduces the damage caused by the urine. Try rotating the acceptable pee locations, allowing the prior pee spot to recover from the previous day's use. If your yard is small, consider creating a "potty zone" by removing the sod entirely and laying down pea gravel.
Make sure to rinse the gravel daily to reduce both smell and urine buildup. When damage does occur, remove the damaged thatch and heavily reseed the area, making sure to water daily to maximize seed germination and growth. Spots often recover quickly if given the chance.
Grass Diseases
There are many diseases that can attack a lawn, causing symptoms like leaf spots, powdery white residue, thin grass growth, dead spots, and severe discoloration. Such symptoms can be caused by powdery mildew, fungal infections, rust and leaf blight, just to name a few.
If a grass disease is indeed the source of your problem, it is important to act quickly to contain and treat the offending disease. There are many fungicides on the market both for specialized and generalized treatment, but before spending money on products that promise the world, seek the help of a professional. Most local farmers’ and gardeners’ co-ops can help not only in the identification of your disease but also in recommending an effective treatment. It is their business to know these things, and seeking their advise early in the season can be a real lawn saver.
Killer Weeds
There are many types of weeds that can encroach on a yard and steal much needed nutrients from your lawn. Their goal is to choke out the grass by killing it at the roots. Crabgrass, clover, dandelions and ryegrass are just a few of the many types of weeds that will attempt to take over your lawn and garden.
Weeds are relentless, so a combined approach of prevention and maintenance will help remove weeds from your lawn. Although no product will ever completely eliminate every weed from your yard, an application of weed preventative in the spring can greatly reduce the appearance of weeds by reducing the germination rate of the previous year’s weed seed.
Frequent mowing will prevent the formation of new flowers and seed heads, cutting down on the spread of existing plants. Weekly fertilization of your lawn will be the final death blow to any weed invasion. First of all, dense, vigorous grass growth will not only resist the spread of encroaching weeds, it will help choke out existing weeds where they are already established. Finally, fertilizing your lawn will cause the existing weed foliage to explode with growth. This vigorous green weed growth will quickly outgrow the roots of the weed, eventually weakening the plant, until it dies.
For many of us, our lawn is our life. We play on it, we entertain our friends on it, and we enjoy the company of our family on it. With a little effort and a lot of love, we can ensure that the grass is always greener on our side of the fence.
Saturday, September 01, 2007
Ants! How to Deal with them in Your Garden.
Thanks to Wikipedia for the following information on Ants.
"Modern society considers the ant a pest and due to the adaptive nature of ant colonies, eliminating them is nearly impossible. Pest control with regard to ants is more a matter of controlling local populations than eliminating an entire colony. Attempts to control ant populations of any kind are temporary solutions.
Typical ants that are classified as pests include pavement ants (otherwise known as the sugar ant), Pharaoh ants, carpenter ants, Argentine ants, and the red imported fire ant. Control of species populations are usually done with bait insecticides, which are either in the form of small granules, or as a sticky liquid that is gathered by the ants as food and then brought back to the nest where the poison is inadvertently spread to other members of the brood — a system that can severely reduce the numbers in a colony if used properly.
Boric acid and borax are often used as insecticides that are relatively safe for humans. With the recent insurgence of the red imported fire ant, a tactic called broadcast baiting has been employed, by which the substance (usually a granule bait designed specifically for fire ants) is spread across a large area, such as a lawn, in order to control populations. Nests may be destroyed by tracing the ants' trails back to the nest, then pouring boiling water into it to kill the queen. This works in about 60% of the mounds and needs about 14 litres (3 gallons) per mound.
Ants that tend other insects can indirectly cause pest infestations. Many homopteran insects that are considered as horticultural pests are controlled by the use of grease rings on the trunks of the trees. These rings cut off the routes for ants and make the pest species vulnerable to parasites and predators."
Subscribe to:
Posts (Atom)
My Ficus Ginseng Plant!
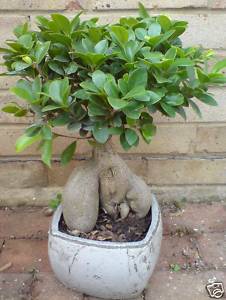
Cool or What?