lawn care, organic, gardening
So poor old Boris Yeltsin has gone the way of all mortal flesh. He was elected President of the USSR in 1991 and withstood attempts to overthrow Mikhail Gorbachev, eventually banning the Communist Party. He stood for Democracy in those dark days, when the West, as usual, stood on the sidelines wringing its hands. He did his best, but his disgraceful antics against Chechnya tainted him in my eyes. What hope for Mother Russia now! I wouldn't trust Putin to lie straight in bed. The man is a KGB Apparatchik and don't forget it.
On to nicer things. Today's Article comes from www.lawncare-business.com
and is devoted to Organic Lawn Care.
Organic Lawn Care
With all the concern about global warming, holes in the ozone layer, and the importance of protecting our environment, many homeowners have turned to focus their sights on finding natural alternatives to synthetic pesticides. A.K.A. – Organic lawn care.
In truth however, the best and most natural way of controlling pests and keeping things in order is to simply maintain a vigorous and lush lawn. Do so, and the lawn will probably take care of the majority of the pest problems on its own. How is that possible, when so many companies stress their importance, every year? Follow these easy and helpful tips to help turn your yard into a beautiful, tough, and pest-resistant lawn. It’s easy. In fact, it takes almost no work at all.
Get Good Grass:
Sometimes, we don’t take the time to think of this and it is, perhaps, one of the most essential steps in improving our lawn. Grass is grass, right? Wrong! In fact, when you do pick out your grass, there are a couple of important things to remember. For instance, when you select your grass, you will need to find one that is well-adapted to your climate. The same grass that grows so well, up in the northern states may not grow as well, down south. Also, take into consideration how much traffic that your lawn gets, every day. If your lawn is high-traffic, from children or pets for instance, you may want to buy a more coarse and sturdy type of grass, something better-able to handle a lot of use.
Another good trick is to refrain from relying upon just one particular kind of grass. A mix of varieties, rather than a single type of grass will provide, not only a stronger grass that is better-suited for high traffic areas, but provides more depth, the different shades and textures making your lawn seem fuller and richer in coloration. For the best advice, contact your local cooperative extension office or a local gardening group, to check on their recommendations.
Find Fitting Fertilizers:
Releasing the nutrients slowly, organic fertilizers are ideal for both your lawn and for the environment. While synthetic fertilizers aren’t exactly bad for the environment either, it is important that you ensure it is a slow-release product, rather than a general all-purpose fertilizer. Additionally, it is a good idea to take a few moments to look over the levels of phosphorous in the fertilizers - you want to work with a low level of phosphorous, if you must work with a synthetic fertilizer.
Back Off Blades:
We tend to like to cut our lawns nice and short and to mow often, but this can have surprisingly negative effects on even the best-tended lawns. One of the most important things you can do to help your lawn is to back those blades up, and raise them so that your grass is mowed to a length of about 2.5 inches. Not only does this help to cut down on dust and prevent erosion, but it also promotes your lawn to expand its root system and this will ensure that your grass is better able to compete with the bothersome weeds that plague our yards. Additionally, if you live in parts of the country that see more extreme temperatures, letting your lawn go a little longer between cuttings will also help it to recover from the hot sun, and prevent sunburned patches.
Cut Up Clippings:
Another great way to add needed nutrients and organic matter to your lawn is a mulching mower. Cutting grass clippings into fine particles makes them easily broken down and absorbed, not to mention how handy it is, not having to deal with raking the lawn or bagging up clippings. Every time you mow your lawn, you are feeding it, as well as keeping your yard looking sharp.
The Art of Aerating:
Imagine the ground beneath your lawn. Every day, it must deal not only with all this grass laying upon it, but the family pet and the children running back and forth across it. It has to endure picnics in the back yard and sunbathing teenagers sprawling out on their towels. Ever notice how your pillow looks, when you don’t fluff it up for a while? It gets thin and flat, squished down into a compacted slab.
Your lawn is much the same way. The dirt becoming compacted down tight and making it more difficult for new roots to grow. Fortunately, core aeration can help keep the soil from compacting down. In turn, this will promote a stronger root system and make your lawn more resistant to pests and droughts, both. If you’re unsure, a good rule of thumb is to aerate once a year, or twice a year will work even better.
Water Wisely:
Many people seem to think that the key to a healthy lawn is ensuring that it get lots of water. Because of this, they set up elaborate sprinkler systems and make sure that the lawns are saturated well, on a daily basis… but is this really wise? Recent findings prove that, instead of the steady dose of water, our lawns actually do much better when they are given more infrequent watering, but are watered deeply. When the water is stored deep in the soil, and this is the water that the grass has access to, it promotes the grass to grow deeper roots, designed to seek this water out.
Opting to go the natural, healthy route for your lawn is an excellent idea; not only does it make your lawn tougher, more pest-resistant and lusher in appearance, it’s also much easier to maintain. No more going to the hardware store and lugging around pesticides and fertilizers - You can leave that up to the Jones. Then, when they ask you what you did to get such a nice lawn, you can just smile and kick back in your lawn chair with a simple, “Not a thing.”
Terry Blackburn. Internet Marketing Consultant, living in South Shields in the North-East of England. Author and Producer of blog http://www.lawnsurgeon.blogspot.com Author of "Your Perfect Lawn," a 90 Page eBook devoted to Lawn Preparation, Lawn Care and Maintenance. Find it at http://www.lawnsurgeon.com
I would be very interested to have your comments on this Article.
Article Source: www.lawncare-business.com
lawn care, organic, gardening
Tuesday, April 24, 2007
Monday, April 23, 2007
Gardening Calendar - Mid Spring!
lawn care, gardening, calendar
Here in U.K. the weather continues cold and blustery. Some bright days, but the wind is cutting on the North East Coast! We are nearing the beginning of May, when hopefully things will warm up - for us as well as our plants. Here is a Calendar of things to do in the garden in mid Spring from our friends at www.greenzonelife.com
Mid Spring
In mid spring the gardens are full of life, we are now truly into the spring season, the moment of fresh growth and the most exciting season of all seasons in the garden. Everything begin to look green and full of life and the warmer days take us out for longer moments. Is the moment of true joy in every gardener heart and one of the busiest season in the garden.
The warmer days provide ideal conditions for all plants and everything will come to life to transform the garden in a place full of colors and flagrances. The small creatures that have overwintered in our gardens also come back to life from their winter hibernation.
The small seedlings that appear in the trays are the result of the weather conditions that give them the light and warmth and help them to become stronger. Some hardy annuals can now be sown directly outside in the place you want them to grow for the summer display. Be careful to keep a straight row when you sow so you can be able to distinguish the flowers from the weeds that are also starting their growth period.
You can plant gladioli corms, dahlias tubers and chrysanthemums outside, in groups of one variety for a better display. You can start dividing large and congested clumps of decorative grasses or spreading perennials and you can remove the winter protection from the containers.
You can start the clippings on the new growth of the decorative hedges, doing this for maintenance or to give them a new look by creating topiary. Also remember to prune back the flowering shoots of forsythia as soon as its flowers have faded.
Now is a perfect time for a general fertilization and weed-killing using general fertilizer and mulch of bark or compost. For having good crops this year, give some extra attention to your fruiting trees by helping them with a good fertilizer and spreading mulch of compost around them to conserve soil moisture and keep the weeds down. Plant disease-resistant varieties and protect the rest of the others by spraying them with a systemic fungicide.
Mid spring is the time to start the sowing in the vegetable garden too, sow or plant directly outside: herbs, lettuce, broad beans, onion, peas, salads, potatoes or carrots under cloches.
Terry Blackburn. Internet Marketing Consultant, living in South Shields in the North-East of England. Author and Producer of blog http://www.lawnsurgeon.blogspot.com Author of "Your Perfect Lawn," a 90 Page eBook devoted to Lawn Preparation, Lawn Care and Maintenance. Find it at http://www.lawnsurgeon.com
I would be very interested to have your comments on this Article.
Article Source: www.greenzonelife.com
lawn care, gardening
Sunday, April 22, 2007
10 Tips for Cutting and Displaying Roses
lawn care, gardening, roses
There is no flower more suitable for cutting than the rose. Strong, sturdy stems, buds that open slowly and elegantly and the bonus of fragrance make roses a favorite in a cutting garden.
Hybrid teas especially lend themselves to cutting. Hybrid tea roses generally produce one perfect blossom at the end of the each stem. Virtually all hybrid tea roses are repeat bloomers throughout the growing season and each blossom may have over 60 petals and be as large as 5 inches across.
Whatever your rose preference, enjoy your blooms even longer with these tips for 4. cutting roses from Marie Iannotti at http://gardening.about.com/od/rose1/a/RoseCutting.htm
10 Tips for Cutting and Displaying Roses
1. Cut roses in after 3 in the afternoon, when they are highest in food reserves.
2. Chooses rose buds that have already begun to open, but that are no more than 1/3 to ½ fully open.
3. Always use clean, sharp pruners to prevent damaging the rose canes and spreading disease.
4. Leave at least 3 leaves on the stem, to feed the plant.
5. Remove all leaves that would be below the water line.
6. Get your roses into water as soon as possible. Bring a bucket of water with you when you cut. If you cut the roses outside without water, re-cut the stems indoors either underwater or immediately plunge them into water.
7. Use either a floral preservative or add a splash of a lemon/lime soda or even a squeeze of lemon and a tablespoon of sugar to the water in the vase.
8 Change the water whenever it starts to get dirty.
9. Let your cut roses have a few hours in a cool spot out of direct sunshine before you display them. This conditioning extends their vase life.
10. If your roses seem to be wilting, water is not able to flow through the stem. Re-cut the stem bottoms and submerge them in very warm, (not so hot you can’t touch it) water and let them sit for about an hour before replacing them in the vase.
Terry Blackburn. Internet Marketing Consultant, living in South Shields in the North-East of England. Author and Producer of blog http://www.lawnsurgeon.blogspot.com Author of "Your Perfect Lawn," a 90 Page eBook devoted to Lawn Preparation, Lawn Care and Maintenance. Find it at http://www.lawnsurgeon.com
I would be very interested to have your comments on this Article.Article Source:
http://gardening.about.com/od/rose1/a/RoseCutting.htm
lawn care, gardening
Friday, April 20, 2007
Lawn Care - So you want a Terrific Lawn?
lawn care, gardening
The thing about gardening, as about life, is to do the simple things regularly and well. The result far outweighing the sum of the individual parts. As an example of this I recommend the following Article from our friends at www.yardcare.com
If you want to have a terrific lawn:
1. Fix the soil and maintain it every year without fail
To grow great grass you need good dirt – healthy humus rich soil filled with earthworms and beneficial microbes. To create good soil, I recommend an annual application of organic material such as autumn leaves or Canadian sphagnum peat moss to your lawn. Use your mulching mower to mulch an inch or so of finely chopped leaves into the grass each fall or spread a 1/8th inch of Canadian sphagnum peat moss on the lawn in the spring and/or the fall. You get a 1/8th inch layer by spreading the peat moss with a grass rake and raking it in so thoroughly it’s no longer visible among the blades of grass.
2. Overseed the lawn every 3 to 4-years even if it looks great
A lawn that is as dense as brand new sod, year after year, will have few weeds. To get the lawn thick, overseed the lawn in the fall or spring once or twice the first year. Once the second year, and then make it a routine to reseed every 3 or 4 years even if the lawn is looking really good.
3. Use a mulching lawnmower
A good mulching lawn mower chops up the grass so fine there are never any clumps left on top of the turf. Recycling clippings back into the lawn for an entire season provides the grass plants as much nitrogen as there is in a application of fertilizer. However, the most important reason, by far for using a mulching mower is to be able to chop leaves finely enough in the fall to leave an inch of chopped leaves on the lawn over the winter to feed those earthworms and beneficial soil microbes that reduce compaction, provide nutrients, and improve drainage.
4. Mow the lawn properly
For the best appearance and good health of lawn grass, mow high using a sharp blade. A dull blade will tear rather than cut the lawn leaving a ragged end on the grass blades that cast a dull haze over the lawn. That ragged edge also leaves the grass more vulnerable to disease. Depending on the size of the lawn, a mower blade becomes dull after one or two seasons and should be sharpened or replaced every year or two. Grass that is dense and cut over 2-inches tall has few weeds and serves as habitat for ants, spiders, and ground beetles which keep the pest insects of a lawn in check. Tall grass shades the soil reducing evaporation of moisture and will not burn out in the heat of summer. Set the mower for 2 to 2-1/2 inches in the spring and fall and raise it to 3 inches in summer.
5. Use only slow release granular fertilizer
Quick release nitrogen fertilizers need to be applied three or four times a year in order to be effective. High in salts, the increased salinity burns turf roots and repels the valuable earthworms and kill many of the beneficial soil microbes. Slow release nitrogen fertilizer needs to be applied only once or twice a year and will not hurt the soil critters. Use slow release nitrogen fertilizer in the spring and again in the fall for a few years, but if you are taking care of your soil, you can drop back to a single application in the fall, or split the application putting down half the recommended amount in spring and half in fall.
6. Avoid watering too much or too little
The key questions in watering the lawn are: “When does the grass need to be watered?” and “How much do I need to water?”. When you walk over a lawn that is mowed tall, you will leave temporary footprints. If the footprints disappear with the grass popping back upright within a minute or two the grass has enough water. If the foot prints last more than 3 or 4 minutes, the lawn needs to be watered. In spring and fall between your hose and Mother Nature, give the lawn an inch of water each week. Lawns need two inches a week in the heat of the summer. An empty tuna fish can is one inch deep so put a few empty tuna cans out in the pattern of your sprinkler and track the time to see how long it takes to fill the cans and you can quickly figure how to deliver an accurate amount of water to the lawn. A rain gauge will help you keep track of Mother Nature’s contribution.
7. Avoid using any broad spectrum insecticides
A lawn that is dense and mowed tall is likely to be inhabited by a healthy population of beneficial insects, including ants, spiders, and ground beetles, seldom has any problems from fleas, grubs, sod webworms, chinch bugs or any other lawn grass insect pest. If you routinely use a broad spectrum insecticide each year, you will kill all the good guys along with the bad guys. If the grass is mowed tall and kept dense from overseeding, those beneficial insects will eliminate the need for the annual use of the insecticide.
8. Spread lime only if needed in late fall, not in the spring
Use lime on the lawn only if you are sure that your soil is acidic enough to justify it. A soil test is the only accurate way to tell. Contact your County Extension Service to get a soil test kit and related information. If you do apply lime, use a granular lime product in October or even in November. It takes six months for granular lime to break down sufficiently to be helpful to the grass plants.
9. Buy only the highest quality grass seed
Only the top quality grass seed includes varieties that have been bred with good disease resistance, look good, and are drought resistant. When you buy the high-end brands, you can trust the grass seed companies to give you the right mixture for the northeast. Buy full sun mix if your lawn gets over 6 hours of sun a day. Use a shade mixture if your lawn gets 3 to 6 hours of sun a day. Any lawn getting less than 3 hours of sun a day must be overseeded every spring to look even average for the season.
10. Get rid of grubs and moles by growing good soil
Grubs and moles are only a problem in lawns that are compacted and have turf with roots only two inches deep. If you add organic matter to the soil under your turf on a yearly basis, the earthworms and soil microbes lower the level of compaction over time, so after 3 to 5 years, the grubs and moles are working down at the 4 to 6 inch depth and are not evident in your lawn.
Terry Blackburn. Internet Marketing Consultant, living in South Shields in the North-East of England. Author and Producer of blog http://www.lawnsurgeon.blogspot.com Author of "Your Perfect Lawn," a 90 Page eBook devoted to Lawn Preparation, Lawn Care and Maintenance. Find it at http://www.lawnsurgeon.com
I would be very interested to have your comments on this Article.
Article Source: http://www.yardcare.com
lawn care, gardening
Gardening - How Not to Dig a Garden Pond!
lawn care, gardening, pond
After my rants of the last 2 days, I thought it was time to lighten up! I was thinking of putting in a small pond in my garden so that I could attract birds, bees, wildlife and so on, when I came across this Article by Michael Hillman at www.emmitsburg.net
Michael owns a Farm called Windy Meadow Farm just south east of Emmitsburg in the U.S.A. and I do like his humour and general approach to life, so I make no apologies for publishing this humourous Article and wish I could have the same life style as Michael.
"The arrival of the first robin, by tradition, is recognized by most as the first sign of spring. Around our farm however, it's the congregating of neighbors around the strawberry patch, daiquiri glasses in hand, that signals the formal arrival of spring. Although the strawberry patch has become the focal point of June-long Bacchus celebrations of friends near and far, it is only the most recent addition to a long line of gardening wonders that Audrey has created since we moved here.
While researching the history of the farm, I was struck by the ebb and flow of the many gardens that have graced this farm over the past one hundred years. Longtime residents talked in reverent tones about the vast and lush gardens of Anna Schealy, who owned the farm from 1918 to 1940. Unfortunately, following the Anna's death, the gardens fell into disrepair. Following the sale of the farm, the house's status changed from one of a primary residence to that of a tenant house. By the time the Sixes took up residence in the 50's, proof of Anna Schealy's gardening wonders had all but evaporated.
In 1950, the Sixes family began their long residence in the house. In spite of the fact that Mrs. Sixes suffered from cancer during most of her tenure on the farm, she turned what energy she did have to cultivating numerous flower gardens. In the many pictures provided by her daughter, Betty Glass, tulips - Mrs. Sixes favorite flower - are prominent. This spring, as the tulips once again provided the first burst of color in the gardens, one couldn't help but smile at the thought of Mrs. Sixes nodding from above in approval of Audrey's efforts.
By the time Audrey put her gardening tools to work around the farm, all evidence of previous gardens had once again disappeared. Audrey spent most of the first winter on the farm designing a vast array of gardens. At first I paid little attention to Audrey's gardening plans, and with good reason, for up until this time, all I had seen of her gardening skill was enclosed within a 6-by-6 foot garden at the veterinary hospital she managed. But, like a little kid with a box of crayons facing a newly painted white wall, Audrey drew garden designs that impressed even our mothers, gardeners extraordinaire in their own right.
Of English lineage, Audrey took to gardening as a fish takes to water. By the end of our first spring, the house once again sported gardens around its entire circumference. Unfortunately, a lot of her initial plantings failed to survive. Quickly recognizing that gardening in clayey soil, hot summers, and a windy environment would require expert advice, Audrey turned to Barb and Marlene at Alloway Gardens in Littlestown for help. Barb and Marlene had "been there" and "done that" and as a result had a solution for every situation Audrey faced. For quite some time, Audrey's Alloway allowance rivaled mine at the local hardware store.
During our second year on the farm, Audrey immersed herself in enlarging and upgrading the gardens around the house and the old barn, all the time, however eyeing our large backyard. Claiming frustration over the hours wasted every week in mowing this large plot of grass, Audrey decided it would make a perfect wildflower meadow and set about collecting wildflower seeds from every part of the country. The following spring, after diligently tilling the soil, she spread the seeds and sat back to wait for the rains to do their magic. Unfortunately, the rains never came that year and by midsummer the much anticipated wildflower garden had become a dust bowl.
The following spring, heavy rains brought abundant growth to the wildflower meadow, but not of the nature Audrey anticipated. Weeds of every shape and size quickly took over the meadow, choking out any wildflower that had managed to germinate. Frustrated but far from beaten, Audrey returned to her drawing board and countless gardening books. Slowly but surely, with help from Barb and Marlene, Audrey drew up the plans for her dream: a formal English garden.
Encompassing most of the backyard, the garden would consist of ten raised beds, varying in length from sixteen to sixty-five feet and in widths from four to sixteen feet. The garden also included a pond for goldfish and toads and was to be enclosed by a white picket fence. Having long since learned how to deal with my propensity to procrastinate, Audrey presented her plans to me shortly after agreeing to allow me to purchase a new horse. Needless to say, I was in no position to object or quibble about the garden's size or cost.
After transplanting a maple seedling - the only item worth saving from the "weed meadow" - to the front of the barn, construction began in earnest. The soil was roto-tilled until it was as fine as sand. Next, a dump truck load of quality top soil, procured from Emmitsburg's own McNair's stone and soil supply, and countless bags of lime, were roto-tilled in to improve the nutrient quality of the clay soil. With blueprints in hand, the location of each bed was laid out and marked by stakes and strings. The walkways between the beds were excavated eight inches below grade and the dirt mounded in the beds, thereby 'raising' the beds above grade.
Once the wood to support the beds was delivered, the actual construction went quickly. Being well ahead of schedule, I took a weekend off to show my new horse. While unloading him from the trailer, I startled him by smacking him on the butt to hurry up, he replied in kind by kicking me in the leg. Needless to say, the full leg cast I found myself in an hour later conveniently ending my participation in the garden project for the remainder of the year.
The following spring, before Audrey allowed me to resume riding, the construction left dormant all winter was completed. As a final touch, as if placing icing on a cake, Audrey found some beautiful multicolor stones, which were spread for the walkways between the many beds. With the beds now completed, Audrey set about planting countless varieties of plants, flowers, and herbs. In accordance with her master plan, each bed in the garden was planted to bloom at a different time.
This plan succeeded so now, from early spring to late fall, there is always one section of the garden in bloom to attract her beloved birds, butterflies and hummingbirds. As a result of her meticulous designs, guests are always treated to brilliant colors, fragrant aromas, and in the evening, countless hummingbirds and butterflies back-dropped by spectacular sunsets. The formal garden has become a favorite gathering place for our friends. Which, in a roundabout way, gets me back to the strawberry patch.
In addition to plants bearing Latin names that I can neither spell nor pronounce, Audrey planted carrots for the horse, catnip for our five cats, potatoes for me (I was bad that year), and strawberries for herself. The first strawberry crop was small, and she harbored her daily harvest with greed. Every morning while she dined on strawberries and cream, I was expected to choke down lukewarm Pop-Tarts.
Unwilling to undergo another season of listening to my whining, that fall, Audrey agreed to triple the size of the strawberry patch. The favorable rains the following spring brought about what can only be called a bumper crop, and for several weeks we ate strawberries for breakfast, lunch, and dinner. While it was fun at first, with no end to the harvest in sight, we both agreed an alternative way of disposing of strawberries had to be found. Audrey suggested giving them away to friends and neighbors. I on the other hand, suggested using them in strawberry daiquiris.
My completely logical argument that making and sharing daiquiris would fulfill the spirit of Audrey's suggestion - only with the strawberries in a different form - fell on deaf ears, and she proceeded to waste them by giving them away unaltered. As fate would have it however, everyone else was having bumper crops of strawberries. So I got the go ahead to execute Plan B: the creation of the perfect strawberry Daiquiri.
It just so happens that the quest began on what would turn out to be the hottest days of that summer. It also happened to coincide with my plans to dig the goldfish pond in the garden. Knowing it was going to be hot that day, I began digging around seven in the morning. By 10:30, with the temperature pushing 90 degrees, I had dug out less then a quarter of what was planned. With motivation waning, I decided to begin my daiquiri experiments.
As near as I can remember, the first few pitchers didn't really make the grade, but they did make the digging go easier. By the time I finished the third pitcher, I found myself filling the hole back in. Half way through the fifth pitcher, when I found myself digging in the front yard instead of the garden, I knew I had the perfect recipe. Unfortunately, I was in no condition to write, which was immaterial, since by that time I couldn't remember what I was putting into them anyway.
The following morning, Audrey woke me just before sunrise from a rather sound sleep and insisted that I fill in the holes in the front yard, pointedly reminding me that the pond was supposed to be behind the house, not in front of it. Progress went quickly, in spite of the pounding in my head and by early afternoon the excavation of the pond was completed. The shovel had no sooner been put away then friends began to gather and inquire about the nature of the holes in the front yard and on the state of my sanity for digging on such a hot day. Audrey, unable to resist, told the story of my secret daiquiri experiments, and I was immediately swamped with offers to serve as guinea pigs for future taste testing.
With pleas to resume the experiments growing louder by the minute, I finally ignored the throbbing in my head and set about making more daiquiris. Unlike the day before, however, the formula for each new pitcher was duly noted and recorded. Like the day before, by the time we got around to the fifth pitcher, no one really cared anymore. After solving most of the worlds problems, including the national debt, global warming, time travel, and peeling fence paint, the exact contents of our glasses didn't seem to matter much.
Fortunately, I did somehow manage to record the formula for the seventh pitcher, during which we collectively put to rest the question of the nature of extraterrestrial life and its impact on next year’s TV show line up. Since after this pitcher no one present remembers anything else, it, by default, was the winning recipe:
8 ounces of dark rum (Myer's or better)
1 ½ quarts fresh strawberries
6 ounces of Lime juice
2 to 3 more ounces of rum
3 to 5 cups of crushed ice4 heaping tablespoons of sugar
2 to 3 more Ounces of rum,
Add rum to taste
The rum is placed in the blender first, followed by the strawberries, which should be halved. Blend together for one minute. Next, add the sugar and lime juice and blend together for another minute. The contents should be sampled at this time, and any additional rum or sugar added to suit one's taste. One should always remember however, to always error on the side of extra rum. Once satisfied, add the crushed ice, another shot of rum, another tablespoon of sugar, and another handful of strawberries. Blend to a smooth texture.
With Daiquiri in hand, sit back and have a long, good conversation with a friend.
Enjoy!"
Terry Blackburn. Internet Marketing Consultant, living in South Shields in the North-East of England. Author and Producer of blog http://www.lawnsurgeon.blogspot.com Author of "Your Perfect Lawn," a 90 Page eBook devoted to Lawn Preparation, Lawn Care and Maintenance. Find it at http://www.lawnsurgeon.com
I would be very interested to have your comments on this Article.
Article Source: www.emmitsburg.net
roses,lawn care, gardening
Thursday, April 19, 2007
Rose Growing The Easy Way - Part 2!
Roses, gardening, lawn care
Following on from yesterday's Article by Brad Jalbert at www.rosemagazine.com, we conclude with the second and last part today. In this troubled World, I often think we have lost touch with Nature and that the Consumer Society has insulated us from Reality. It's a fact that most people wouldn't know how to grow food to keep their families alive in an emergency. Most people today are reliant on Supermarkets to provide their food, pre-wrapped and packaged, ready to go in the oven, or already cooked. Little do they realise that Supermarkets, by their very nature, carry only sufficient stocks to keep the shelves stacked, so as to enhance cash flow. The result is that we are all within 1 month of starving to death in the event of a Catastrophe.
How many people actually have reserves of food stocked up in their Larders? How many people could even light and heat their homes without electricity and gas supplies? How many people even know how to grow things other than weeds in their garden?
It's a sad indictment of modern day Society that all the hard won survival experience of our forefathers has, in the main, been lost.
God help us in the event of a real emergency. We are so cocooned from reality, from the World as it really is, that I fear for us all!
Enough already! Rant over for the day. Getting back to roses, here is the second part of the Article!
Step By Step Planting
1. Dig an appropriate sized hole for the root ball, loosening surrounding soil. Usually a 2ft by 2ft hole for large roses and a 1 foot hole for minis.
2. Add some compost or well rotted manure to the hole plus a handful of bone meal. Mix gently and taste ( just kidding). Spread the roots over this mixture positioning the crown at the soil level or slightly below, and refill around the roots with more of your good mixture. Firm the plant and water well. Water is really the secret in helping a rose or any plant get off to a good start in life. Remember to water a new plant often, especially if the weather turns hot.
Fertilizing
This is the really easy part of rose growing. The first and most important type of rose food is plain old water. A rose that is well watered throughout the summer will grow far better than one that's treated to loads of chemical rose foods but little water. I use organic fertilizer outside with great success. Seakelp is excellent as are fish fertilizers and Canola meal. Many people like the all purpose rose foods available in most garden centres. Try not to get to hung up on stuffing your rose plant full of rose foods, and apply only a small handful about every six weeks if you remember. Fertilizer should not be applied after July 15 , as the plants need to use up what's in the soil and 'harden up' for winter. If all of this sounds too confusing, just throw a handful down before and after the first bloom, and your sure to get pretty roses.
Pests & Diseases
The old saying "an ounce of prevention is worth a pound of cure" certainly holds true here. Planting a rose in good soil with plenty of sunshine and air circulation is your first and most important defense against insect and disease problems. Mildew and Blackspot are the two most troublesome problems but with a little effort can be easily controlled. If you don't want to spray fungicides at all, then be sure to plant disease- free roses like the Rugosas or one of the healthiest of the others. Strip off all the leaves before your rose begins to regrow in the spring and watch for any sign of trouble.
Most home gardeners can grow great roses without the use of insecticides. Aphids are easily washed off a plant or are soon eaten up by beneficial insects in a healthy garden. Other insects can be picked off or given the hose treatment. Spider mites are a real problem for people who spray often, but seldom bother the organic garden. When it comes to insects and disease, roses are truly highly over- rated, as many other types of plants from tomatoes to carrots have their troubles but we seem to demand perfection from our roses. Try not to be to concerned about the odd spoiled leaf but take reasonable precautions against bad outbreaks.
I have often wondered why people make such a fuss over growing roses and worry about the insects and diseases that could strike, and miss all the fun. I guess roses are just one of those plants that exude such majestic beauty, that we assume they must be difficult to cultivate. In my few short years of growing roses I have learned two things: some people just love complaining about roses, while others just love roses."
Terry Blackburn. Internet Marketing Consultant, living in South Shields in the North-East of England. Author and Producer of blog http://www.lawnsurgeon.blogspot.com Author of "Your Perfect Lawn," a 90 Page eBook devoted to Lawn Preparation, Lawn Care and Maintenance. Find it at http://www.lawnsurgeon.com
I would be very interested to have your comments on this Article.
Article Source: www.rosemagazine.com
roses,lawn care, gardening
Wednesday, April 18, 2007
Rose Growing the Easy Way - Part 1!
gardening, lawn care, roses
Lawns by themselves are beautiful things. On their own, they enhance any garden. However, to really set off your Lawn, there can be no finer sight then a border edging of beautiful roses. Our Article today comes from Brad Jalbert at www.rosemagazine.com and gives sound advice on how to grow Roses without headaches. Following the tragic circumstances in America during the last few days, I thought that dwelling on these beautiful flowers might act as a soothing balm and a loving tribute to all those poor Students who died so tragically on their Campus. God keep them!
"Roses are probably the most misunderstood and undervalued plants in the modern landscape. Most people seem to believe that all garden roses are troublesome, frail plants that need to be pampered and fussed over with weekly sprays and frequent fertilizing. While this can be true for the devoted, exhibitor, it simply does not have to be the case for the average gardener like myself who likes to look at pretty flowers. I grow over 400 roses of all types in my garden with an absolute minimum of fuss. Most of the time is actually spent cutting roses for friends, family and people just walking through the garden.
If you are new to roses, it would be a good idea to become vaguely familiar with the many different types:
Hybrid Teas: This is the flower that everyone pictures when we think about what a rose should look like. The classic spiral centre and individual long stem make this the most popular of the rose classes. The modern hybrid tea can be an excellent garden plant, as breeders are concentrating on improving disease resistance and overall garden performance. Many people believe that fragrance has been bred out of the modern rose, but there are many excellent tea roses with strong perfumes and more being introduced each year. Rose breeders realize that people still want fragrance in their gardens. Hybrid Teas are great for the formal garden, but should not be limited to this use. If you don't want be bothered with fussing about roses, be sure to seek the advice of an experienced rose grower who can advise you on the healthy and hardy varieties for your climate.
Climbing Roses: The modern climber is usually a repeat bloomer and grows around 10 to 12 feet tall or wide. There are so many different types available that it's hard to describe them in one paragraph. Let me just say that they are the anchor plants of my garden and definitley the favorite plants of visitors.
Floribundas: Commonly called cluster flowered roses. These come in many shapes and colours. Like the Hybrid Teas, many varieties have excellent perfume, combined with unmatched flower power. Bloom shape can be ruffled and informal or high centred like the HTs. Floribundas are generally considered to be excellent landscape plants, providing bloom from June to Hard Frost. Most varieties grow from 2 to 4 feet tall, but there are a few large ones in this class, ( the Americans call the big ones Grandifloras). Several modern varieties are capable of having over 50 blooms at the same time, with only a short rest in between the repeat cycle. If you're looking for roses that are well mannered and provide armloads of cut flowers, try planting a few floribundas.
Old Garden and Shrub roses: These two classes are roses are separate from one another but have similar growth habits. The shrub rose are without question the most underrated plant in the landscape. It's a shame that more people haven't taken the time to familiarize themselves with this group of plants. Shrub roses are a huge part of the rose family with growth habits varying from low ground cover types to large impenetrable hedge types. I have seen a few cities and parks make use of the mediland shrub roses, but with so many types available for the home gardener it's a wonder that more are not sold in nurseries. The shrub type roses are usually very winter hardy and healthy, with the Rugosa's being completely disease free. Some of the shrubs have an added bonus of colourful fall hip displays . If you're the type of gardener who wants a lot of bang for you buck, then this is the type of rose for you.
Mini roses: A really fascinating group of roses with all the characteristics of large rose reduced to mini proportions. You can even find miniature climbing roses with smaller flowers and leaves growing to about 7 feet tall. Most types grow about 14 inches high, are everblooming and come in every colour except true blue or black. These plants are not house plants, but will flourish in any home garden with minimal care.
Now that you're familiar with the various types of roses, lets get on with the best kept secret on the web, "How to grow Roses the Easy Way".
As with many types of plants, variety is extremely important if you want to be a successful rose gardener. There are many hundreds of red roses on the market at any given time but only a few that are best suited for our climate and soil types. Try to find out what the best ones are for your area and then buy a #1 plant from a reputable nursery. Two for one roses rarely amount to much, especially when planted late in the season.
Roses are best planted in the fall or early Spring. Dormant plants are preferred over fully leafed out plants except for container grown and mini roses. Mini roses are usually purchased fully leafed out and best planted when the weather begins to warm in April or May. If you are transplanting an established rose bush, wait until fall or early spring when the plant is dormant, and remember to give it a judicious pruning.
Site and exposure requirements depend on the type of rose. Usually 5 to 6 hours of sun is preferred for most roses but there are a few shrubs, climbers and Rugosa types that will grow in more shaded situations. If you must choose between morning or afternoon sunshine, take the earlier option. Early morning sun will dry off the leaves, helping to prevent mildew and blackspot. Roses will tolerate a windy exposed site provided that hardy varieties are chosen or a winter mulch is applied to protect from harsh winter conditions."
We will continue this Article tomorrow, when we can go into planting techniques.
Terry Blackburn. Internet Marketing Consultant, living in South Shields in the North-East of England. Author and Producer of blog http://www.lawnsurgeon.blogspot.com Author of "Your Perfect Lawn," a 90 Page eBook devoted to Lawn Preparation, Lawn Care and Maintenance. Find it at http://www.lawnsurgeon.com
I would be very interested to have your comments on this Article.
Article Source: www.rosemagazine.com
roses,lawn care, gardening
Tuesday, April 17, 2007
Gardening - Beware of Toxic Mulch!
lawn care, gardening, toxic, mulch
When I was putting together yesterday's Article on growing your own tomatoes, I came across this Article by our old friend Michael J McGroarty at http://gardening-articles.com
It deals with the subject of Mulch, and refers mainly to the USA, but I think there is value in the Article for all gardeners!
Mulching beds has become extremely popular these days, and mulch can be really beneficial to your plants and the soil in your planting beds, but there are things you need to watch for.
Here in Ohio the most popular type of mulch that people use is shredded hardwood bark mulch, which is a by product of the timber industry. When they haul the logs into the sawmill the first thing they do is debark them. Years ago the bark was a huge problem for the mills because there didn't seem to be a useful purpose for it, until people realized the hidden benefits that it held. Still to this day, the bark is a headache for the saw mills, and they don't always understand how to properly handle it.
They like to pile it as high as they can so it takes up less space in their yard. The mulch really tends to back up during the winter months because there is little demand for it. In order for the mills to pile the mulch high, they literally have have to drive the large front end loaders up onto the pile. Of course the weight of these large machines compacts the mulch in the pile, and this can become a huge problem for you or I if we happen to get some mulch that has been stacked too high, and compacted too tightly.
When the trees are first debarked the mulch is fairly fresh, and needs to decompose before we dare use it around our plants. The decomposition process requires oxygen and air flow into the pile. When the mulch is compacted too tight, this air flow can not take place, and as the mulch continues to decompose it becomes extremely hot as the organic matter ferments. Sometimes the extreme heat combined with the inability to release the heat can cause the pile to burst into flame through spontaneous combustion.
In other cases the mulch heats up, can not release the gas, and the mulch actually becomes toxic. When this occurs the mulch develops an overbearing odor that will take your breath away as you dig into the pile. When you spread this toxic mulch around your plants the gas it contains is released, and this gas can and will burn your plants.
It has happened to me twice. Once at my own house, and once on a job I was doing for a customer. This toxic mulch is very potent. We spilled a little mulch in the foliage of a Dwarf Alberta Spruce that we were mulching around, and just a few minutes later brushed the mulch out of the plant. The next day my customer noticed that one side of the plant was all brown. The mulch had only been there for a matter of minutes.
Not only did I have to replace the Dwarf Alberta Spruce, but the mulch also damaged at least 10 other plants that I had to replace. I once saw where somebody ordered a truckload of mulch, had it dumped in their driveway, and as the toxic mulch slid out of the dump truck onto the asphalt the toxic gas that was released settled on the lawn next to the driveway.
The gas, not the mulch, turned the grass brown next to the mulch pile.
This same person spread several yards of the mulch around their house before they realized the problem, and it ruined many of their plants.
Now here's the hard part. Trying to explain to you how to identify toxic mulch. It has a very strong odor that will take your breath away. But then again almost all mulch has a powerful odor. This is very different than your typical mulch smell, but I can't explain it any better than that.
The mulch looks perfectly normal, maybe a little darker in color than usual. If you suspect a problem with the mulch you have, take a couple of shovels full, and place it around an inexpensive plant. Maybe just a couple of flowers. When doing this test use mulch from inside the mulch pile and not from the edges. The mulch on the edge of the pile has more than likely released most of the toxic gas that it may have held.
If after 24 hours the test plants are okay, the mulch should be fine. The
purpose of this article is not to induce panic at the mulch yard, but toxic mulch can do serious damage. At my house it burned the leaves right off some of the plants in my landscape, and burned the grass next to the bed all the way around the house. It looked like somebody had taken a torch and burned the grass back about 2” all the way around the bed. If I hadn't seen it with my own eyes I wouldn't have believed it.
Terry Blackburn. Internet Marketing Consultant, living in South Shields in the North-East of England. Author and Producer of blog http://www.lawnsurgeon.blogspot.com Author of "Your Perfect Lawn," a 90 Page eBook devoted to Lawn Preparation, Lawn Care and Maintenance. Find it at http://www.lawnsurgeon.com
I would be very interested to have your comments on this Article.
Article Source: http://www.http://gardening-articles/.com
lawn care, gardening, toxic, mulch
Monday, April 16, 2007
Gardening - Planting Tomatoes in your Garden!
lawn care, gardening
For a change I thought I would leave the subject of Lawns alone for a while. I was having Lunch yesterday and noticed that the tomatoes I was eating actually came from the Canary Islands. Can you imagine that? The UK is importing tomatoes. Unbelievable. I bet the all powerful Supermarkets will have something to do with this decision. Something about cheap labour springs to mind. Buy low and sell high is their maxim. Anyway, before I go off on a rant, let me recommend the following article to you by Kathy Anderson on the question of growing your own tomatoes in your own garden. The Empire Strikes Back!!!
"Tomatoes are without a doubt one of the most popular vegetables in
the home garden, and for good reason. Homegrown tomatoes are
very nutritious and much more flavorful than those bought from a
store. Tomato plants will produce an abundance of fruit for the home
gardener if they are properly planted and cared for.
Tomatoes require a fairly long growing season, and for this reason the
seeds are typically planted indoors about six to eight weeks before they can be planted in the garden. The seeds can be sown 1/4" deep in small pots or flats in a soil less potting mix or sterilized potting soil. It takes 7-14 days at a temperature of 70-80 degrees Fahrenheit for the seeds to germinate. Keep the soil moist but not soggy. Placing plastic wrap loosely over the pots or flats will help maintain the humidity necessary for germination, but the plastic wrap must be removed once the seedlings sprout.
Bottom heat helps to speed the germination process. Garden centers and catalogs sell heating cables made just for this purpose, but you may also set the pots or flats on top of your water heater to take advantage of its warmth for germination.
As soon as the seedlings emerge, they should be moved to an area with full light, such as a sunny window or under grow lights. They should have light on them for about 12 hours a day and should be kept at a temperature of 70-80 degrees. Fertilize the seedlings with a water-soluble fertilizer when they're about 3-4 weeks old, but dilute the fertilizer to about half the strength recommended on the label.
The little tomato plants will be accustomed to fairly steady and warm temperatures indoors, and planting them directly outside could come as quite a shock to them, especially when nighttime temperatures are still cool. About a week before it's time to plant them in the garden, begin to gradually introduce them to outdoor conditions. This is called hardening off, and it simply involves moving the plants gradually to conditions more like what they'll experience in the garden.
Start hardening them off by moving the plants to an enclosed porch for a day or two, then to a sunny spot outdoors that is protected from the wind. If the temperature threatens to take a drastic downward dip, bring the plants back indoors until it warms up outside again.
Tomatoes were originally found only in very warm climates. They don't like to be cold and should not be planted outside until the danger of frost has passed and the soil has warmed up. That's typically late May or even early June here in northern Ohio.
The sooner tomatoes are planted outside, the sooner they will begin to produce ripe fruit, and there are a few tricks that make it possible to plant tomatoes in the garden a bit earlier.
The garden soil may be warmed up by covering it with clear or white plastic for a few days. The little tomato plants will be much happier with their roots in warm soil. Once the plants are in the garden, the foliage can be protected from a light frost by covering the plants with plastic gallon jugs that have their bottoms removed, or with plastic or
fabric sheets placed over the plants. Suspend this over the plants using wire hoops so the plastic or fabric doesn't touch the foliage.
When you are ready to transplant your tomato seedlings into the garden, be sure to choose a spot for them that gets full sun for at least 8 hours a day. Dig a hole for each plant that is large enough to easily accommodate all of the roots. Before transplanting, water the plants
while they are still in the pot. This not only helps prevent transplant shock, but it also makes it easier to slip the plant from the pot.
Tomato plants will grow roots from any part of the stem that is buried beneath the soil, so the plants will benefit from being planted deeply, up to the first set of leaves. If the plants have spent too much time in pots and have become leggy, they may be planted in furrows with their too-long stems laid in the furrow and gently buried with soil. This will
help the plants develop a strong root system while preventing the long stem from breaking.
Fill in the planting hole with soil, pressing the soil in firmly to eliminate air pockets. Then give the plants a good drink of water, thoroughly soaking the soil around them.
If you plan on staking or trellising your tomato plants, they can be planted about 2-3 feet apart. Plants that will be allowed to sprawl on the ground will need more room and should be planted 4-6 feet apart.
If the soil is still a bit cool, your white or clear plastic may be placed on the ground beneath the plants to warm the soil. Once warmer temperatures have settled in, this plastic should be removed to avoid burning the foliage with reflective heat.
It is important to keep tomato leaves up off the soil to help prevent soil-borne diseases from attacking the plants. This can easily be done by applying straw mulch around the plants. But straw mulch should only be applied once the soil has warmed up above 70 degrees. If the mulch is laid down while the soil is still cool, it will keep the soil from
warming up as it should, your tomato plants will suffer from cold feet and won't produce as well as they could.
Planting your tomatoes properly is an important step toward a bountiful harvest of sweet, juicy fruit. In another article we'll discuss how to trellis and prune tomato plants to increase your harvest."
Kathy Anderson has been an avid gardener for many years and has grown tomatoes by the acre, along with many other vegetables, flowers and landscape plants. Kathy recommends http://www.freeplants.com as a great place to learn more about gardening. Article provided by http://gardening-articles.com.
Terry Blackburn. Internet Marketing Consultant, living in South Shields in the North-East of England. Author and Producer of blog http://www.lawnsurgeon.blogspot.com Author of "Your Perfect Lawn," a 90 Page eBook devoted to Lawn Preparation, Lawn Care and Maintenance. Find it at http://www.lawnsurgeon.com
I would be very interested to have your comments on this Article.
Article Source: http://www.http://gardening-articles/.com
lawn care, gardening
Sunday, April 15, 2007
Lawn Care
lawn care. gardening
Hi again Folks - Back from my holidays, refreshed and raring to go! As a matter of interest I visited Fort William and the Isle of Skye in Scotland while I was away. What wonderful scenery, and the weather was great. God must have been having a good day when he made Scotland. And then he went and spoiled it by inhabiting it with the most moaning, whingeing, chip on shoulder men in dresses it has ever been my misfortune to meet. The only thing those anti-social Neanderthals can do well is moan and drink. I am sad to say that the only good thing that came out of Scotland was the road south to England!
On to happier things - I came across this Article on Lawn Care by Michael J McGroarty (God I hope he's not Scottish!) at http://gardening-articles.com. which I recommend to you all.
Lawn Care Tips
by Michael J. McGroarty
A beautiful lawn does not come without some effort. Depending upon what type of soil you have, the amount of effort will vary. For instance when raising trees and shrubs, sandy or a gravel base soil is great. Landscape plants like well drained soiled. A lawn on the other hand is different. Lawn grasses grow constantly throughout the growing season, and need an ample supply of both nutrients and water.
The most basic of lawn care tips includes regular watering and fertilization is required to keep a lawn beautiful. If you’re lucky enough to have a lawn that was originally planted in good rich topsoil, you won’t have to work near as hard as somebody like me, who has a lawn that is planted in sandy gravel. The soil at our house has little nutritional value, nor does it have the ability to retain any amount of moisture. By mid May my lawn starts drying out. It is very difficult for us to keep our lawn looking nice.
Lawns are one area where a little clay in the soil is a good thing. Of course standing water is not good, but having soil that has the ability to retain some moisture is helpful. If you happen to be installing a new lawn, here's a news flash from my lawn care tips that will make all the difference in the world: Add lots of organic matter before you install your new lawn if you have sand or gravel type soil. The easiest way to do this is to find some good rich topsoil and spread that over your existing soil.
Because most lawn grasses grow so vigorously, they need additional amounts of nutrients added in order to stay looking nice. Just use one of the four step programs offered by the fertilizer companies. Most of these programs also include weed control along with the fertilizer. Here in the north we basically have two concerns with weeds in our lawns.
Crabgrass can be a problem, and I do consider it a weed. In order to control crabgrass you must use a pre-emergent herbicide that will prevent the crabgrass seeds from germinating. In order for this herbicide to be effective you must apply it early in the spring while the soil temperature is still below 45° F.
Broadleaf weeds such as Dandelions are another problem, although fairly easy to control with a broadleaf weed control. Most broadleaf herbicides are mixed in with the fertilizers, and must be applied when the grass and weeds are damp. The wet foliage will cause the herbicide to stick to the weed, giving the herbicide time to be absorbed by the weed. Once absorbed the herbicide translocates through the weed plant and kills it completely.
These types of herbicides are considered “selective” since they seem to know the difference between a grass plant and a weed. That’s why they only kill the broadleaf weeds and not the grass itself. However, many people have different kinds of thick bladed grass in their lawn such as quack grass. Quack grass is on the ugly side, and can really detract from a lawn. The problem is, it is still in the grass family, and “selective” herbicides leave it alone because it is a card carry member of the grass family.
So what’s a person to do?
In order to get rid of these thick bladed grasses you must use a “non-selective” herbicide, and “non-selective” herbicides don’t care who they kill. Well, at least that’s true in the plant kingdom. When you use a “non-selective” herbicide you must understand that everything that you spray is going to die, but it really is the only effective way to rid your lawn of undesirable thick bladed grasses. This type of treatment is effective if you have isolated areas that contain wide bladed grasses. You’ll have to spray all the grass in the area, then reseed with good quality grass seed.
My herbicide of choice for this type of spraying is RoundUp®. It is believed that RoundUp® does not have any residual effect, which means that it does not linger in the soil. That means that the new grass seed or the young grass plants will not be affected by the herbicide. Being a non-selective herbicide you must be careful when spraying, making sure that the spray does not drift onto other plants or lawn areas that you do not want to kill.
To keep the spray from drifting adjust the nozzle so that the spray pattern is narrow with larger spray droplets. You do not want a fine atomized spray if there is danger of spray drift. It also helps to keep the pressure in the sprayer as low as possible. Pump the sprayer a minimum number of times, to keep the pressure low. You just want enough pressure to deliver the spray, but not atomize it to the point that it can be easily carried by the wind.
Buy a sprayer just for herbicides and mark it as such. You never want to spray plants with a sprayer that has been used for herbicides.
Once you have sprayed the area you want to kill, wait three days before doing anything else. After a period of three days the grasses that you sprayed may not look any different, but if they have been properly sprayed, they will die. It takes three days for the herbicide to translocate throughout the entire plant, then the plants will die. So even though the weeds and grass plants look fine, you can start digging and chopping and not worry about them growing back. If you start digging and chopping before the three day period you will interrupt the herbicide, and the weeds and grass you were trying to kill may come back.
If you happen to be installing a new lawn, make sure you spray all the weeds and thick bladed grasses before you start. Once you have the lawn installed, you sure don’t want to go through all the trouble of killing areas of your lawn and reseeding. If you make sure that all of these undesirables have been killed before you start, you’ll be way ahead of the game.
When selecting grass seed, you should always use a blend that is recommend for your area. Here in the north a popular blend contains fine bladed perennial rye grass, fescue, and blue grass. Keep in mind that it takes blue grass seeds 28 days to germinate, while most perennial rye grasses germinate in 5 or 6 days, so you never want to plant a lawn that is 100% Kentucky blue grass. Before the blue grass seeds have a chance to germinate, every kind of weed imaginable will already be actively growing in your lawn.
With a blend, the faster germinating grasses come up quick, and act as a nurse crop for the slower germinating seeds. Having a blend also gives you some protection in case some new pest comes along that attacks certain types of grasses.
People often ask if they have to have their lawn hydro-seeded in order for it to be nice. The answer is no. Hydro-seed is not some kind of magic formula. It is nothing more than a fancy way to apply grass seed. A hyrdo-seeder is just a machine that mixes water, grass seed, fertilizer and mulch into a slurry that is sprayed onto your lawn. The ingredients are exactly the same that you would use if you seed by hand, with the exception of the mulch.
And contrary to popular belief, hydro mulch is no better than good old fashioned straw. In my opinion straw is a much, much better mulch. The primary advantage to hydro-seed is that the grass seed is thoroughly soaked before it is applied, which assures germination. That’s a huge advantage if your seeding along a freeway where it is not practical to wet the seed after it has been applied. At your house, it really doesn’t mean much. Hand seeding works just fine.
With either method, you still have to water just as much once the seeding is done. Many people are lead to believe that hydro-seed doesn’t have to be watered as much as hand seed. This is a huge misconception. If you fail to water hydro-seed once it is applied, it will still germinate and little tiny grass plants will appear. But just a few hours without water on a hot day, and those little tiny grass plants will wither and die. This is a big problem because once the seed has germinated, it is spent. All the water in the world will not make that spent seed produce another grass plant.
Hydro seed has its benefits, but for the residential lawn it’s not all that important. Why do I claim that straw is a better mulch than hydro-mulch? Think about how the hydro-mulch is applied. It is mixed with the seed, fertilizer and water as a slurry, and sprayed on the lawn. The mulch has not been applied over top of the seed which is how mulch is supposed to be applied, it is all mixed together. Some of the seeds are under the mulch, and some of the seeds are on top of the mulch. Mulch can’t do much good when the seeds are resting up on top of it. They might as well be sun bathing!
Now think about the process of hand seeding. The seed is spread on the soil, then you should take a push broom and drag it backwards over top of the seeded area. This applies a very thin layer of soil over most of the seeds. Then you spread the straw over top of the soil. The pieces of straw are scattered in all directions, with many of them crisscrossing each other.
Remember the movie, “Honey I shrunk the Kids”? The part where they are walking through the lawn and the blades of grass are huge compared to them? This is what it’s like to be a grass seed under a mulch of straw. Those little tiny grass seeds are lost under the straw, and that's exactly what you want to protect them from the intense rays of the sun.
As the sun works its way across the sky the grass seeds actually receive filtered sunlight. Enough sun to warm the seeds so they grow, but also enough shade to protect the tender young grass plants. As the grass plants grow, they also raise the mulch with them to a degree, providing additional shade for the seeds that haven’t germinated yet. The shade that straw mulch provides also helps to retain the moisture around the seeds. Grass seeds will never get this kind of protection from hydro mulch.
Another trait of hydro-seed is that as the slurry dries, it becomes a blanket over the lawn. In the event of a heavy rainfall, running water tends to get under this blanket and carry it away, leaving big areas with no seed at all. They make a glue that you can actually add to the hydro seed mix, but my experience has shown that the glue will hold the hydro seed in place a little longer, but when it does wash out much larger areas wash because they are glued together.
With hand seeding, each seed is independent, and they fall between the nicks and crannies of the soil. In the event of heavy rain, the running water must be severe enough to wash the soil away before the seeds can be moved. I’ve installed hundreds of lawns using both techniques, for the difference in cost I’ll take the hand seeded lawn any day.
Michael J. McGroarty is the author of this article. Visit his most interesting website, http://www.freeplants.com and sign up for his excellent gardening newsletter. Article provided by, http://gardening-articles.com.
Terry Blackburn. Internet Marketing Consultant, living in South Shields in the North-East of England. Author and Producer of blog http://www.lawnsurgeon.blogspot.com Author of "Your Perfect Lawn," a 90 Page eBook devoted to Lawn Preparation, Lawn Care and Maintenance. Find it at http://www.lawnsurgeon.com
I would be very interested to have your comments on this Article.
Article Source: http://www.http://gardening-articles/.com
lawn care, gardening
Sunday, April 01, 2007
Happy Holidays!!!
lawn care, gardening
Hi everyone. I'm going on holiday for 2 weeks. Back on 15th April. Wish me joy!!!
terry
lawn care, gardening
Hi everyone. I'm going on holiday for 2 weeks. Back on 15th April. Wish me joy!!!
terry
lawn care, gardening
Subscribe to:
Posts (Atom)
My Ficus Ginseng Plant!
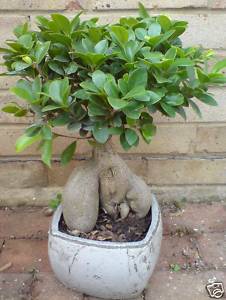
Cool or What?